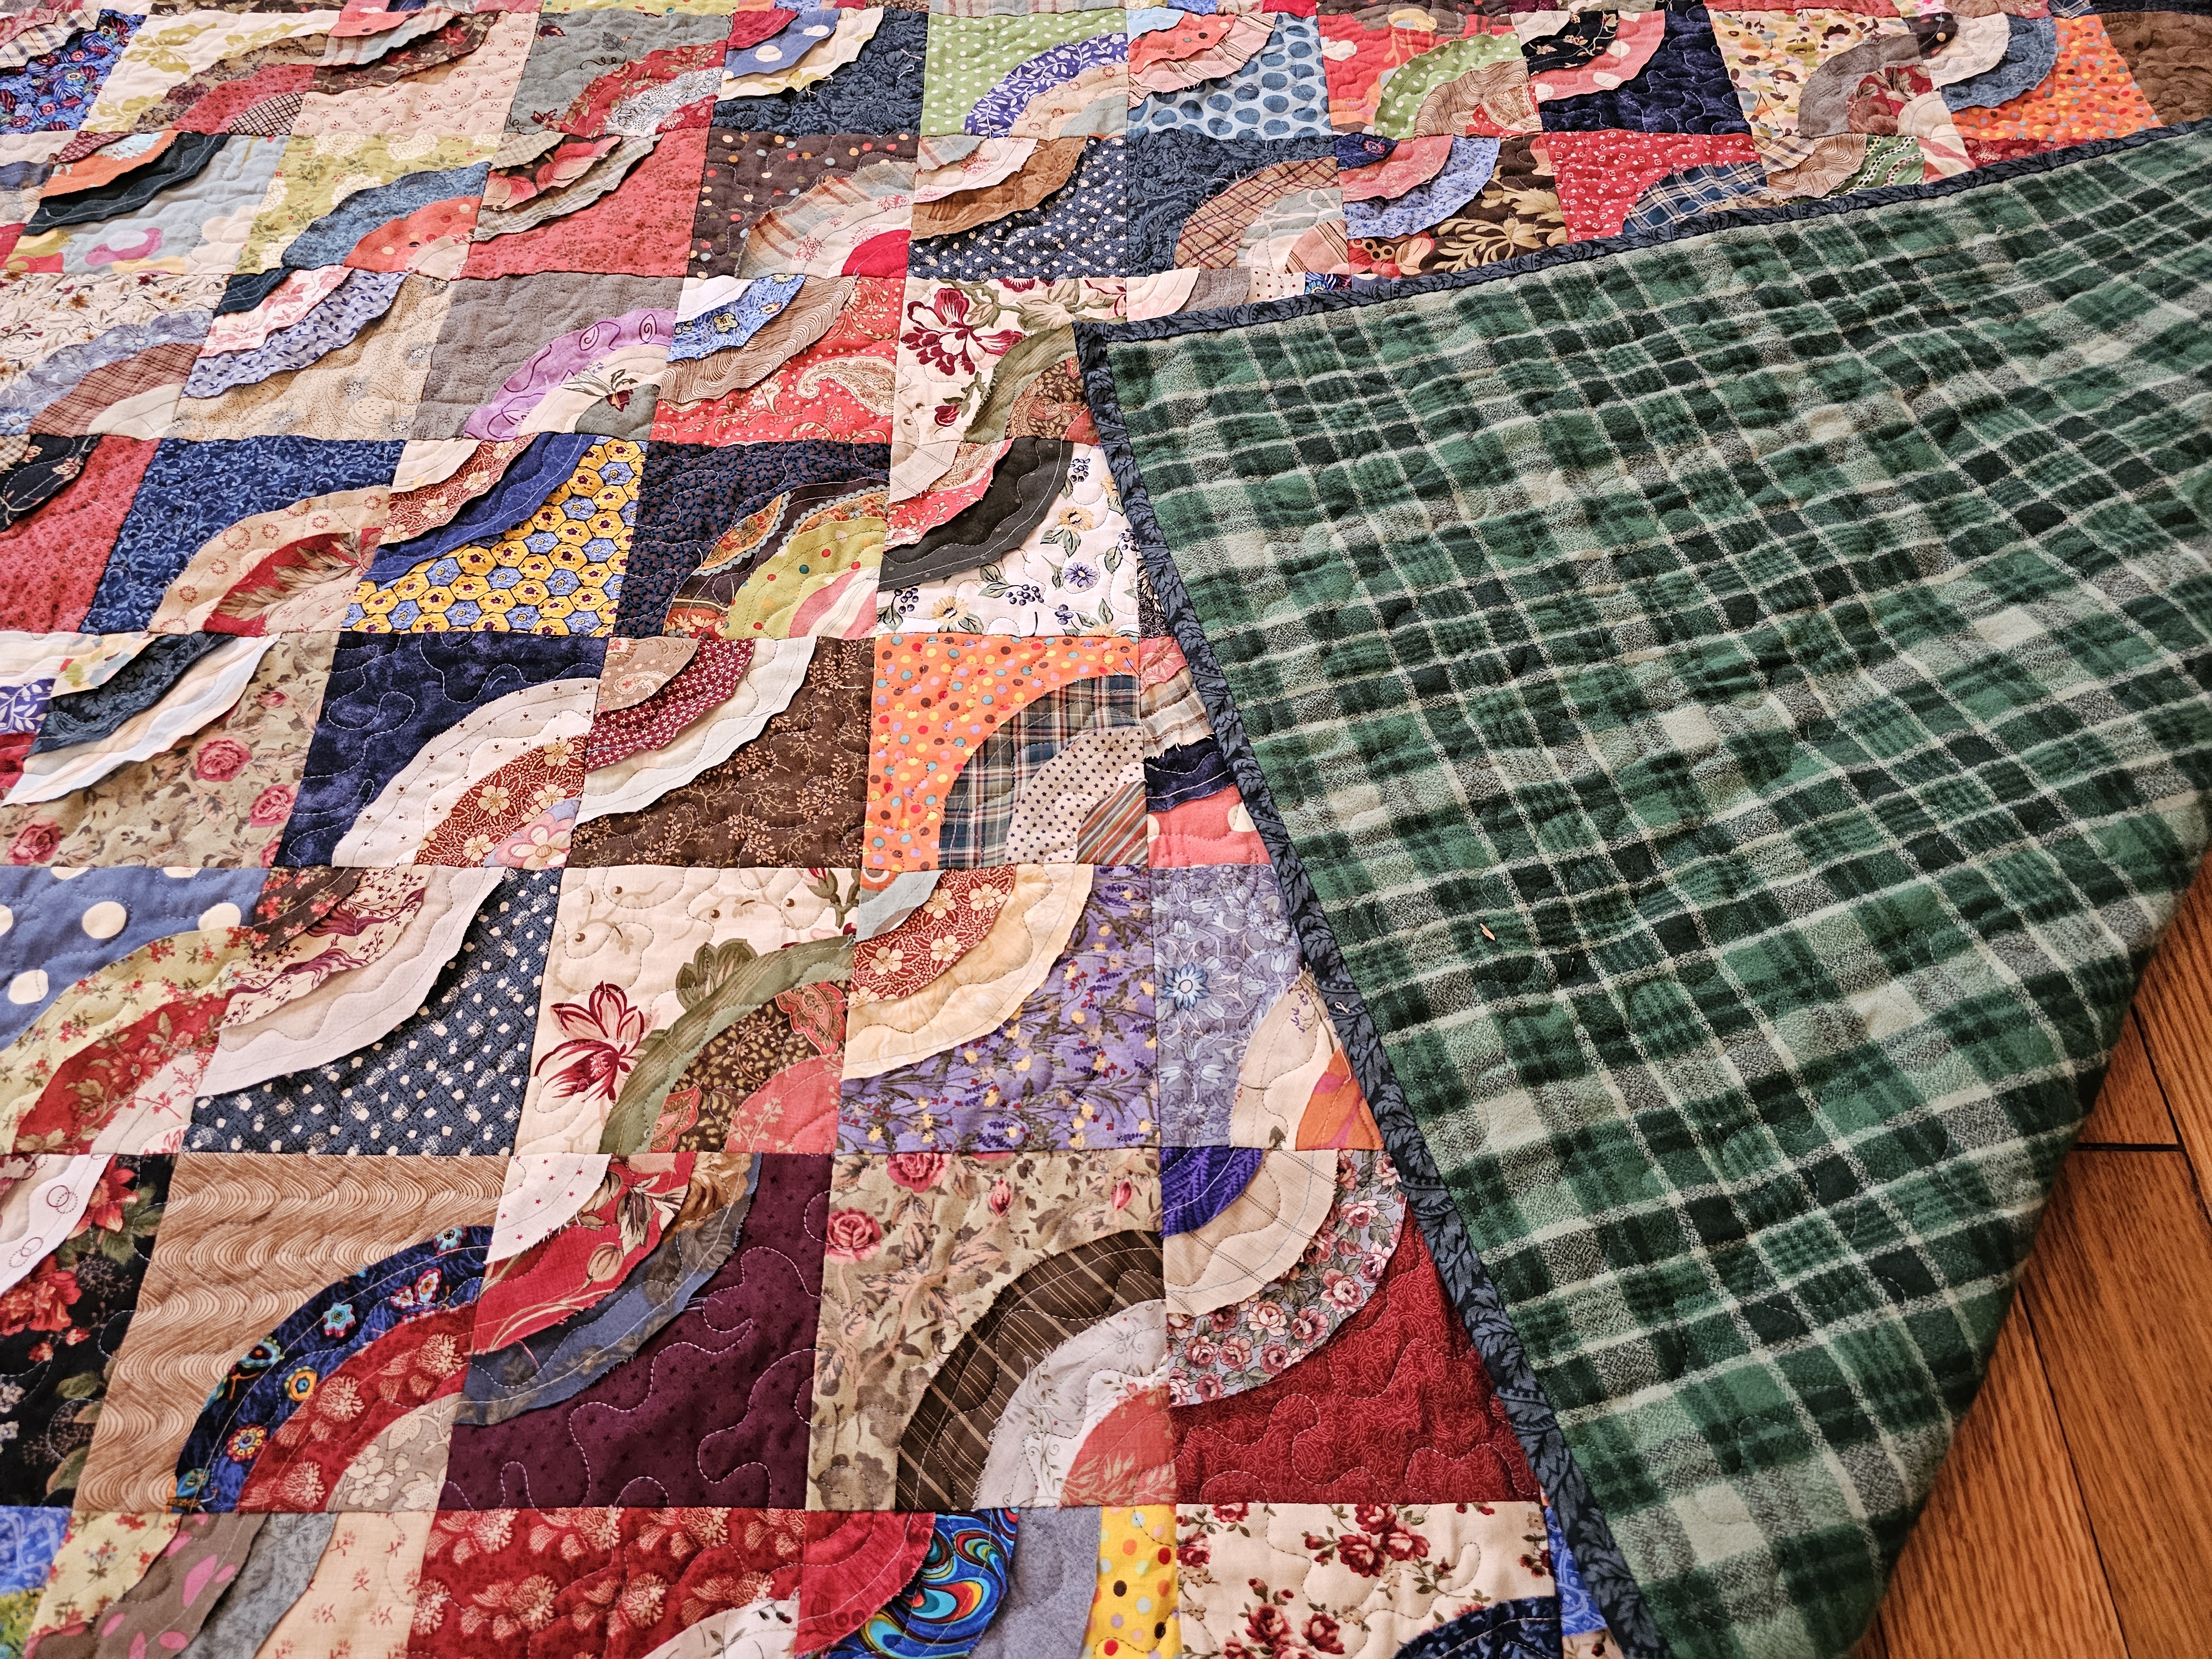
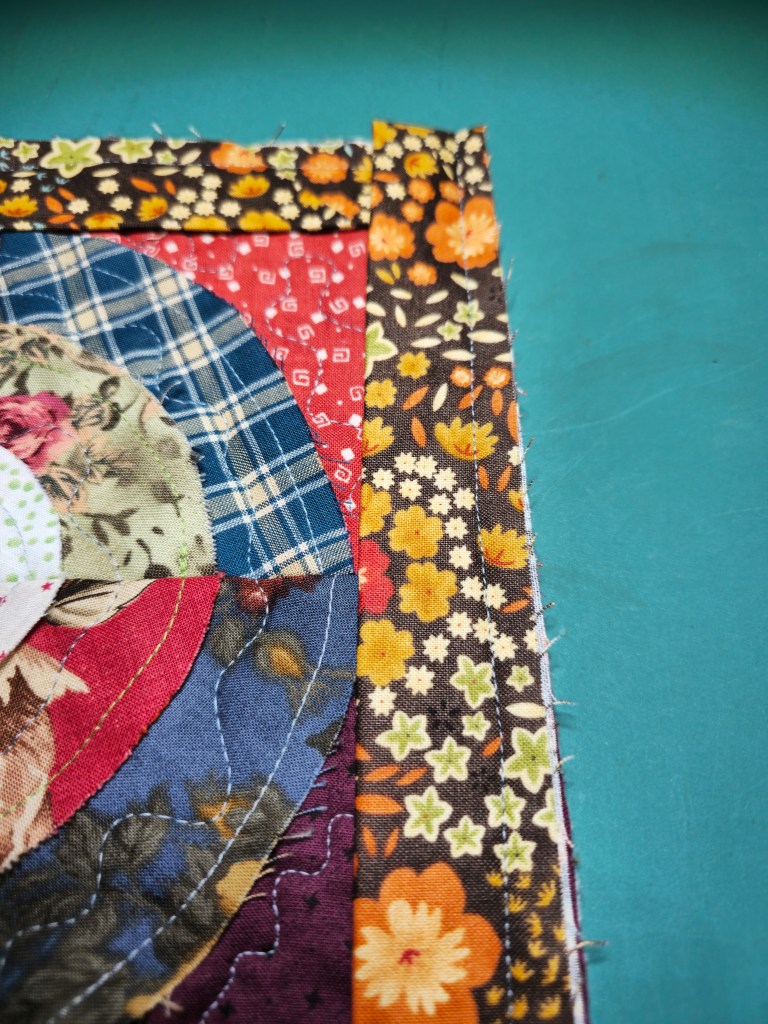
Not to be all poetic, but when you’re wrapping up the process of making a quilt, you’re literally wrapping up the quilt…with the binding! This final step is one that I’ve come to truly love.
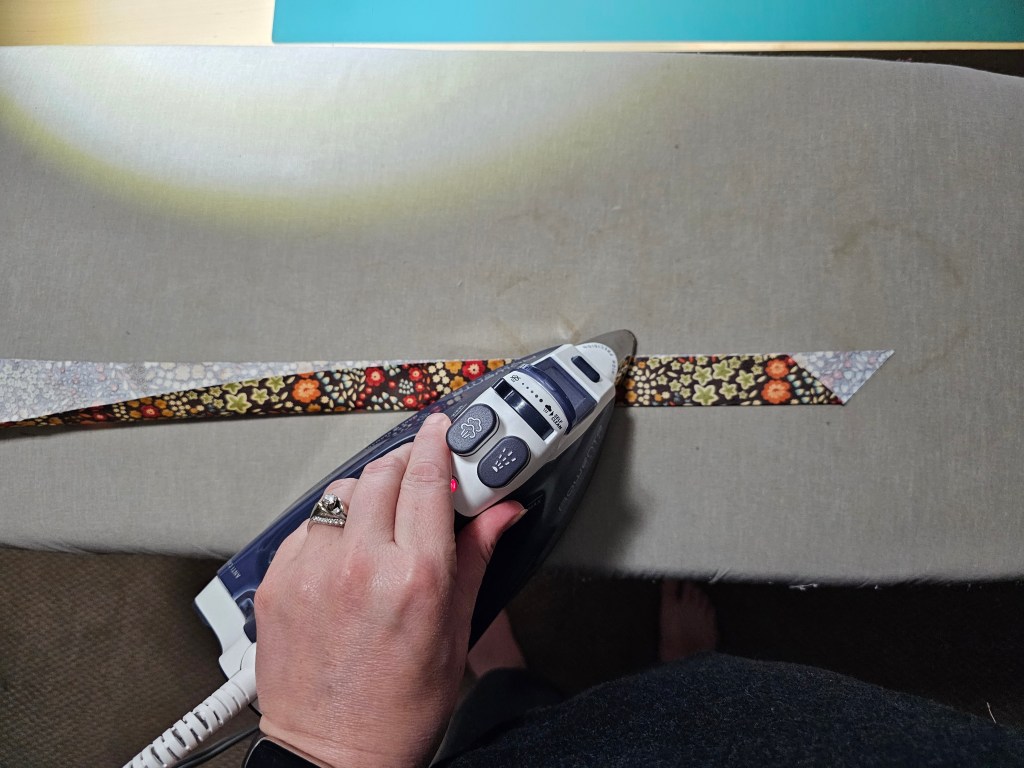
To assemble the binding, you cut strips of fabric (2.5″ for me), trim the ends of the strips to 45-degree angles and sew them together (the angled seam distributes the bulk of the fabric so it isn’t all folded over on itself), iron the new, united strip in half (the long way, pretty sides out), and machine sew the binding around the outside edge of the top of the quilt. Then, you wrap the binding around the raw edge of the quilt and sew it down. This last step can be done via machine or by hand.
In the early days of quilting, I completed that final step by machine-sewing the binding. It made for quicker finishes and it meant I didn’t have to hand-sew anything…which I generally don’t/didn’t enjoy. But at some point in the last 10-12 years, I’ve started hand-sewing my bindings. Not only do I think it makes for a more polished finish, I’ve come to truly love those final hours, snuggled up under the quilt while I work on it. It’s a little test-drive, if you will…making sure the quilt is functioning properly before I send it off into the world.
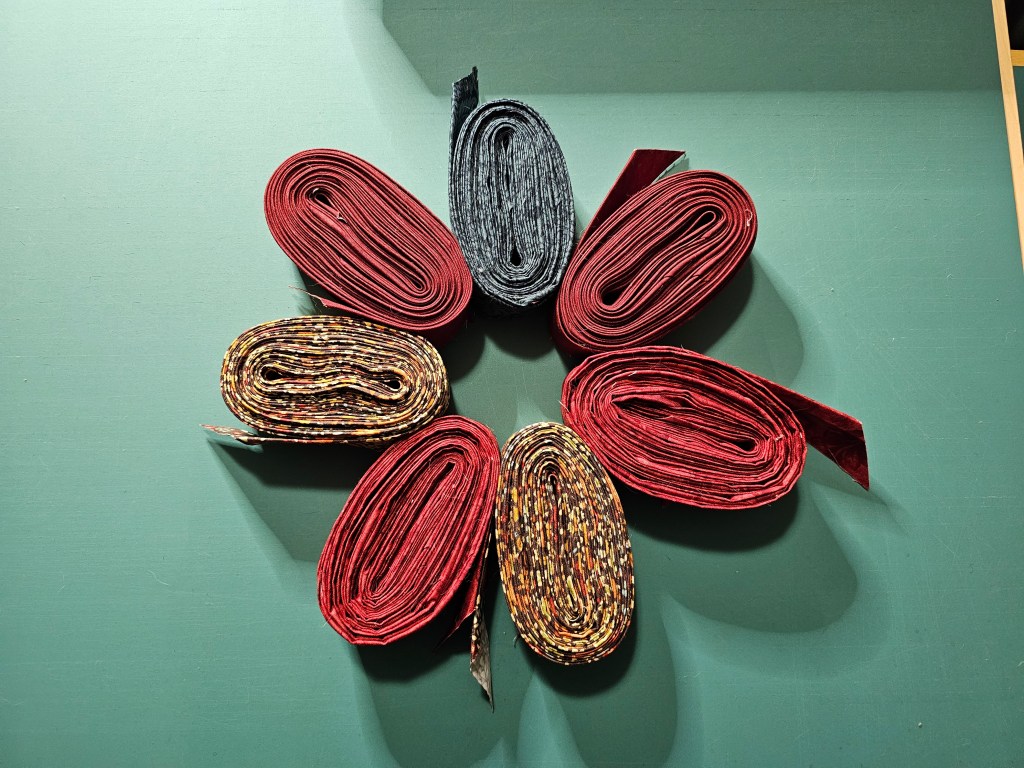
The bindings for all seven quilts have been assembled. When I finish machine quilting each quilt, I attach the binding to the front side. Once I’m done machine quilting all seven, I’ll start hand-finishing all the bindings…the perfect activity for these chilly fall nights.
Okay! Here we go! It’s time to announce the organizations that will be on the receiving end of your generosity!
I’ve been thinking about this for the last couple years, as I’ve conceptualized the auction and worked on the quilts. Should I choose smaller local places? Larger, well-recognized places? How do I narrow it down to just seven organizations? Or, more accurately, what organizations do I save for the next quilt auction (a few years from now), because do you have any idea how much batik fabric I have and need to get moving on? Yikes. If all goes well, I may do another auction in the future.
And just as a reminder, each of the seven quilts will get paired with one of the seven organizations. So you can bid based on the organization you’d like to support or on the quilt you like best. You can even bid based on which of the backing fabrics speaks to you the brightest. There are plenty of ways to arrive at your decision!
Please read through and learn more about these fantastic organizations. Get inspired by all the amazing work they’re doing. Get ready to bid on a quilt and support these great causes!
Important detail: The auction will go live on Monday, November 6 and will close on Sunday, November 12. All bidding will happen through 32auctions.com (link provided as we get closer to the event).
We all know about Planned Parenthood and the important work they do, but Abortion Care Network (ACN) works to form a coalition of the independent clinics that “provide care for the majority of people seeking abortion in the U.S. – often serving individuals and families with the fewest resources and in the most rural parts of our nation.” Visit their site to learn more about how ACN is making sure that abortion care is recognized as essential health care. Follow ACN on social media!
I recently learned about Alight, an organization that provides humanitarian aid and disaster relief to displaced people. Their mission is to co-create new communities with people who have been “forcibly displaced due to persecution, conflict, violence and climate change.” Although this is a global organization, I am most excited to help support the work Alight is doing in Minnesota with new Afghan families. Follow that link to read more about the homes that have been created, the marketplace of goods that is available, the local field trips available to these new Minnesota families, and the women’s sewing circle…at which I’m going to teach quilting later this winter! AH – HOORAY! Follow Alight on social media!
Neon lights and civil rights. That’s what you’ll see when you walk into the All Square restaurant on Minnehaha Avenue in Minneapolis. But the restaurant (serving the best grilled cheese in town!) is just the beginning. All Square is committed to restorative justice, racial equality, and criminal justice reform. The All Square fellowship programs are dedicated to the empowerment, employment, education, and healing of their formerly incarcerated fellows. Follow All Square on social media!
I don’t know if I’ve ever been as inspired or as humbled as the day I spent with Bryan Stevenson of the Equal Justice Initiative. He came to our campus as a speaker, and I was fortunate enough to spend the day accompanying him to the various engagements. He had boundless energy and attention for the people who came to meet with him and hear him speak about his work. EJI “provides legal representation to people who have been illegally convicted, unfairly sentenced, or abused in state jails and prisons. “We challenge the death penalty and excessive punishment and we provide re-entry assistance to formerly incarcerated people.” Challenging us to confront our country’s long legacy of racism while serving those impacted by injustice is a bold mission. Learn all about this organization and get inspired! Follow EJI on social media!
Family Tree Clinic has been providing reproductive and sexual health care in Minnesota for 50 years, and in that time, they’ve never turned anyone away due to an inability to pay. With a commitment to education, advocacy, and justice, FTC removes barriers to quality care for all. In addition to gender affirming care, they participate in the Midwest Trans Health Education Network and offer connections to legal assistance for queer and trans people. Follow FTC on social media!
We Need Diverse Books works to “advocate for essential changes in the publishing industry to produce and promote literature that reflects and honors the lives of all young people.” Through grants for libraries, educators, authors, and illustrators, as well as advocacy and education programs, WNDB strives to create “a world where everyone can find themselves in the pages of a book.” Follow WNDB on social media!
World Central Kitchen understands that cooking food is a true demonstration of love and comfort. Founded by Professional Chef José Andrés in 2010, WCK “is first to the frontlines, providing fresh meals in response to humanitarian, climate, and community crises. […] The WCK approach is that we should always work with urgency, listen to communities, and adapt.” Whether it’s natural disaster relief, or feeding isolated villages in the Ukraine, WCK is on the ground, doing the work. Follow WCK on social media!
About a year or two into my quilting hobby, I decided to take another beginners class. I felt like it couldn’t hurt to get a bit of a refresher. Additionally, the class I chose also included applique and mitered borders…skills I’d yet to attempt.
I was living in River Falls, Wisconsin at the time, and I ended up going back home to New Richmond to take the class at a shop that no longer exists. If I remember correctly, it was a four week class that introduced basics like 9-patches and triangles, but also included some other, more advanced skills (see the aforementioned applique and mitered borders). It was not–if I may be so bold– a good experience. Way too much jammed into a short time period, and the instructor was…not great.
The last night of the course, before I left, I was talking with the women who owned the shop. I knew them a bit even before I took the class (thanks to growing up in a small town), so I could tell they were looking for some feedback. When one of the asked me how it went, I responded, “Do you want me to be nice, or do you want me to be honest?” They asked for honesty, so I, tactfully, gave it to them. As we wrapped up the conversation that night, they asked me if *I* wanted to teach beginning quilting at their store! I was shocked…and thrilled!
Thus began my brief tenure as a quilting instructor. I taught at their store for a few years while I was living in River Falls. In addition to teaching the four-week beginners class, I also taught a one-day intergenerational class (think moms/kids or grandmas/grandkids). There may have been another couple one-off courses? Maybe paper-pieced stars? Maybe an Irish Chain? I truly loved teaching people how to quilt.
Kind of a cool “full-circle” moment was visiting a newer quilt shop in New Richmond a year or so ago, and the woman who cut my fabric and rang up the sale told me that she took my beginners class all those years ago and has been quilting ever since! I couldn’t even get my mind around that. It was amazing!
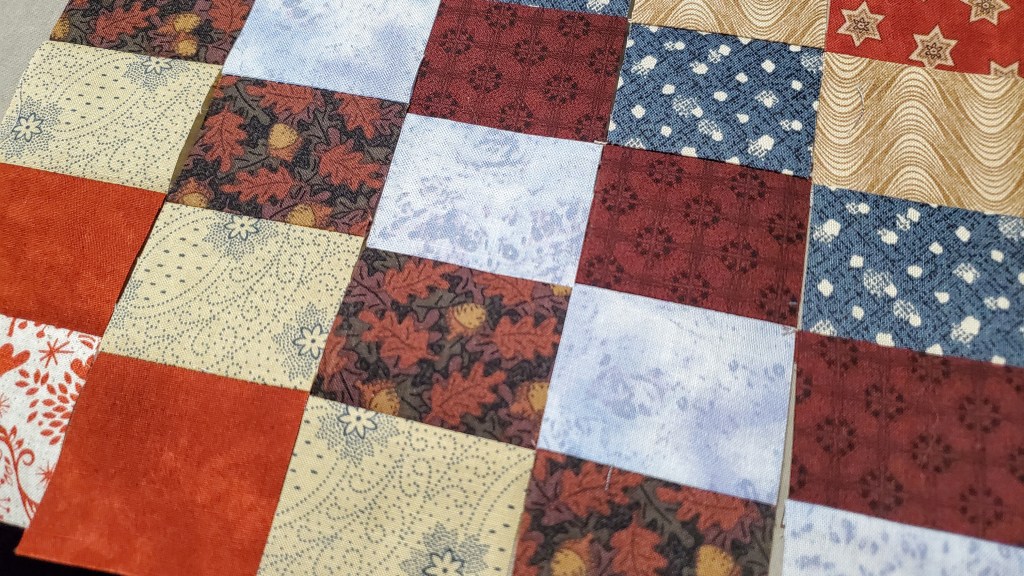
Anyway, in the photo below, check out that acorn/oak leaf fabric. That was from the not-so-great beginners class that I took (I partnered it with a light tan and a dusty purple). Per the requirements of the class, I tried to applique an acorn in the middle of that wall hanging sized mess of a project. I can’t remember if I ever managed to miter the borders. Neither of those techniques ever stuck. To this day, I don’t ever use either of them.
As I continue to work on the auction quilts, I’ll have to keep my eye open for fabrics from the quilt I designed for the beginners class I taught. I think I’ve seen at least the primary fabric, but I’ve yet to grab a photo. I have no idea what ever happened to that demo quilt? I looked for it when I dug out the first quilt I ever made…but they weren’t stored together. Who knows where it could be?
Anyway, cheers to the disaster of a beginners class that gave me my teaching opportunity…I hope to get to do it again some day!
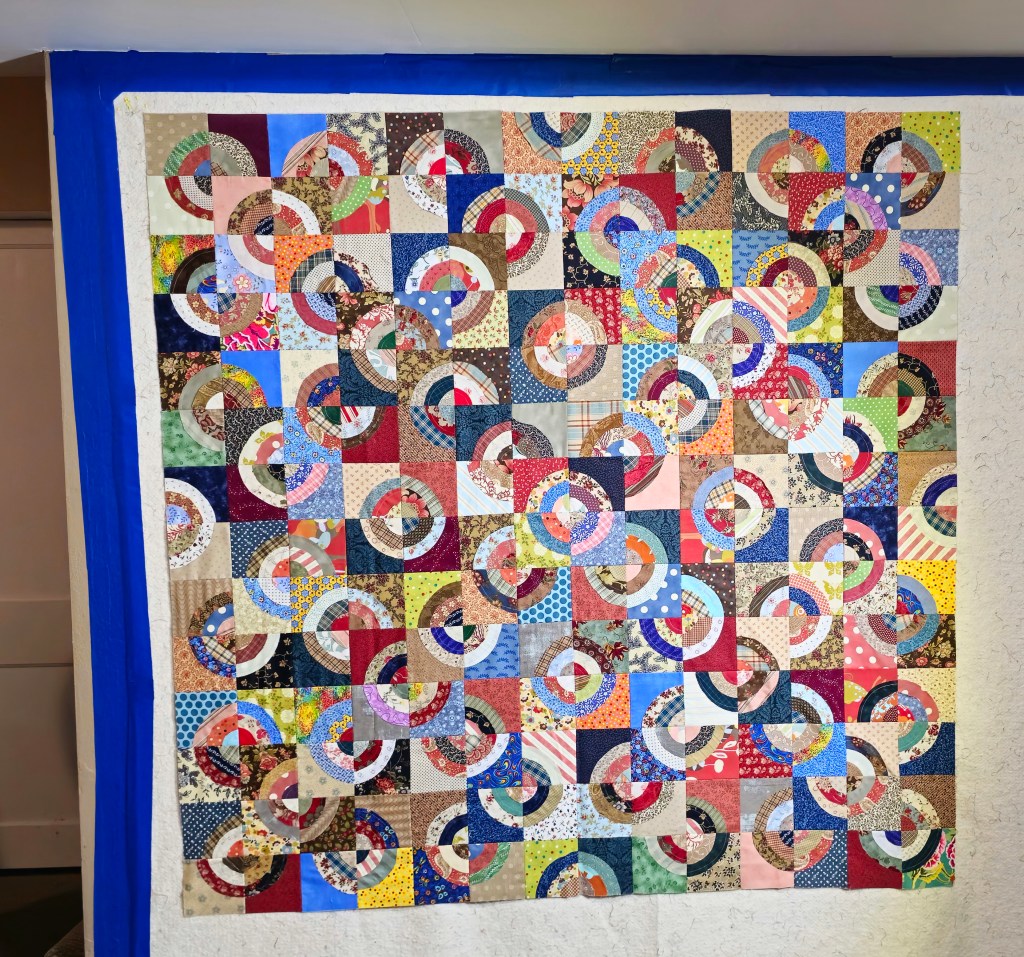
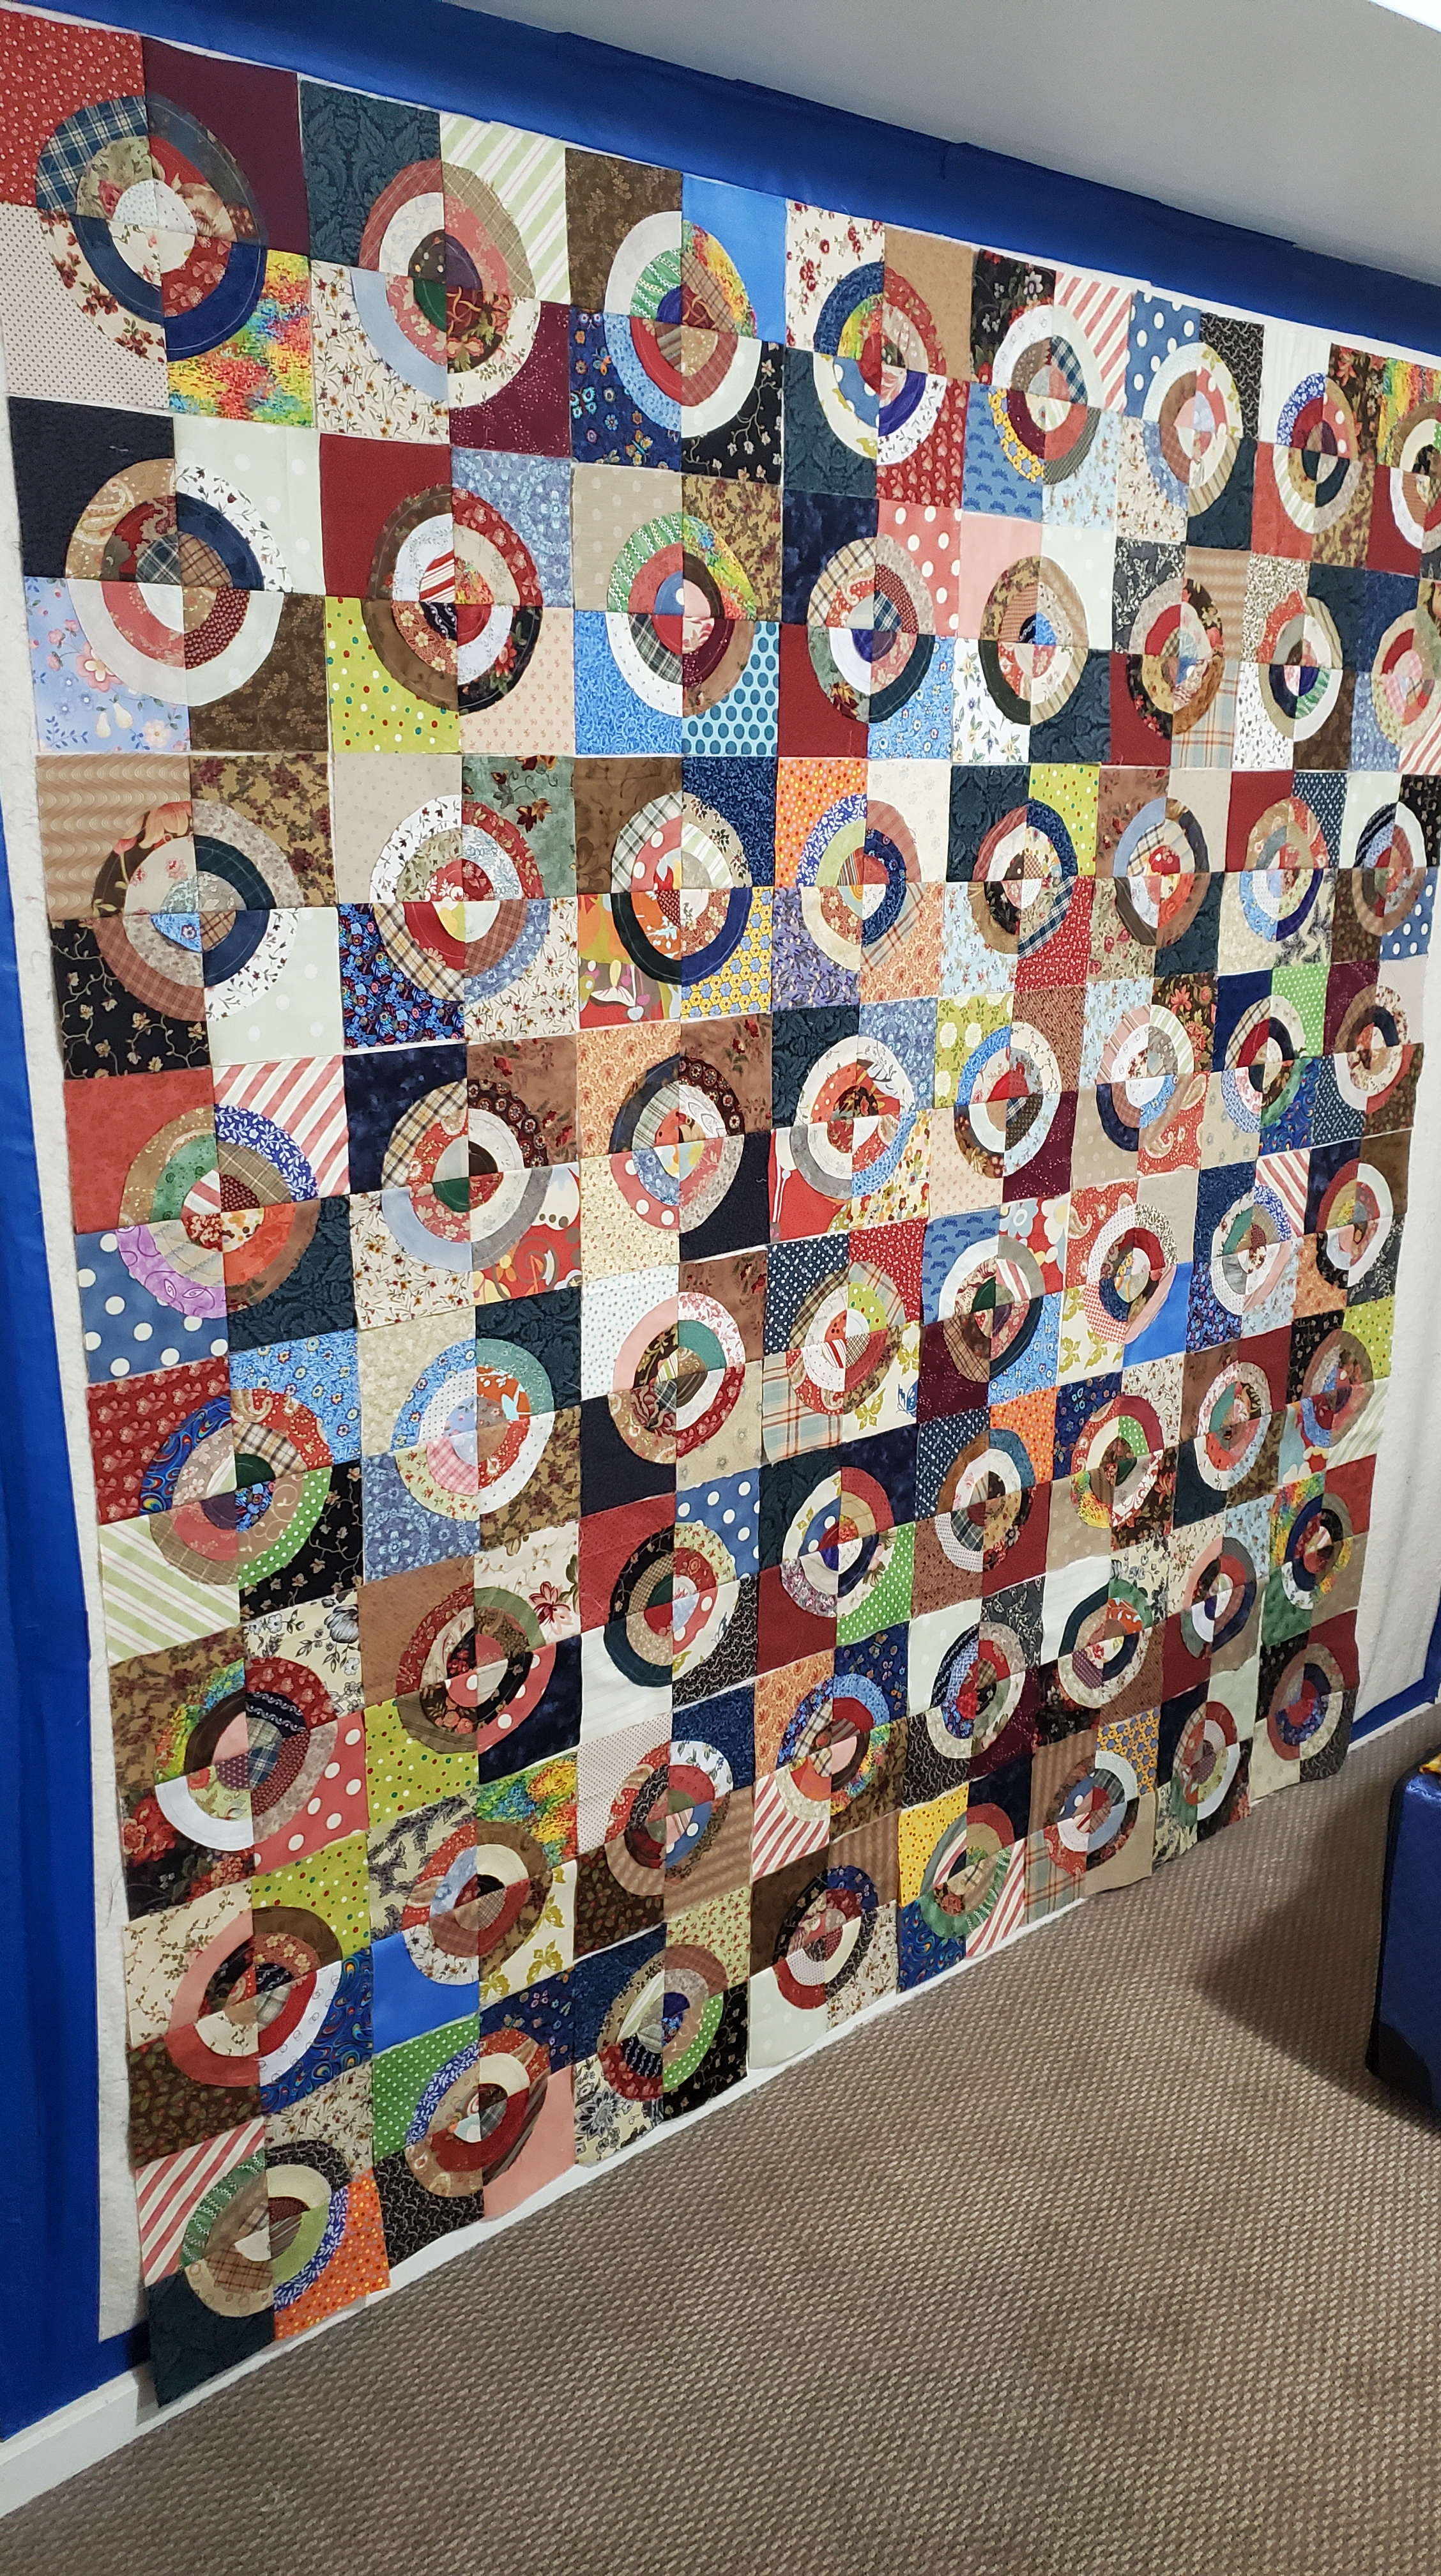
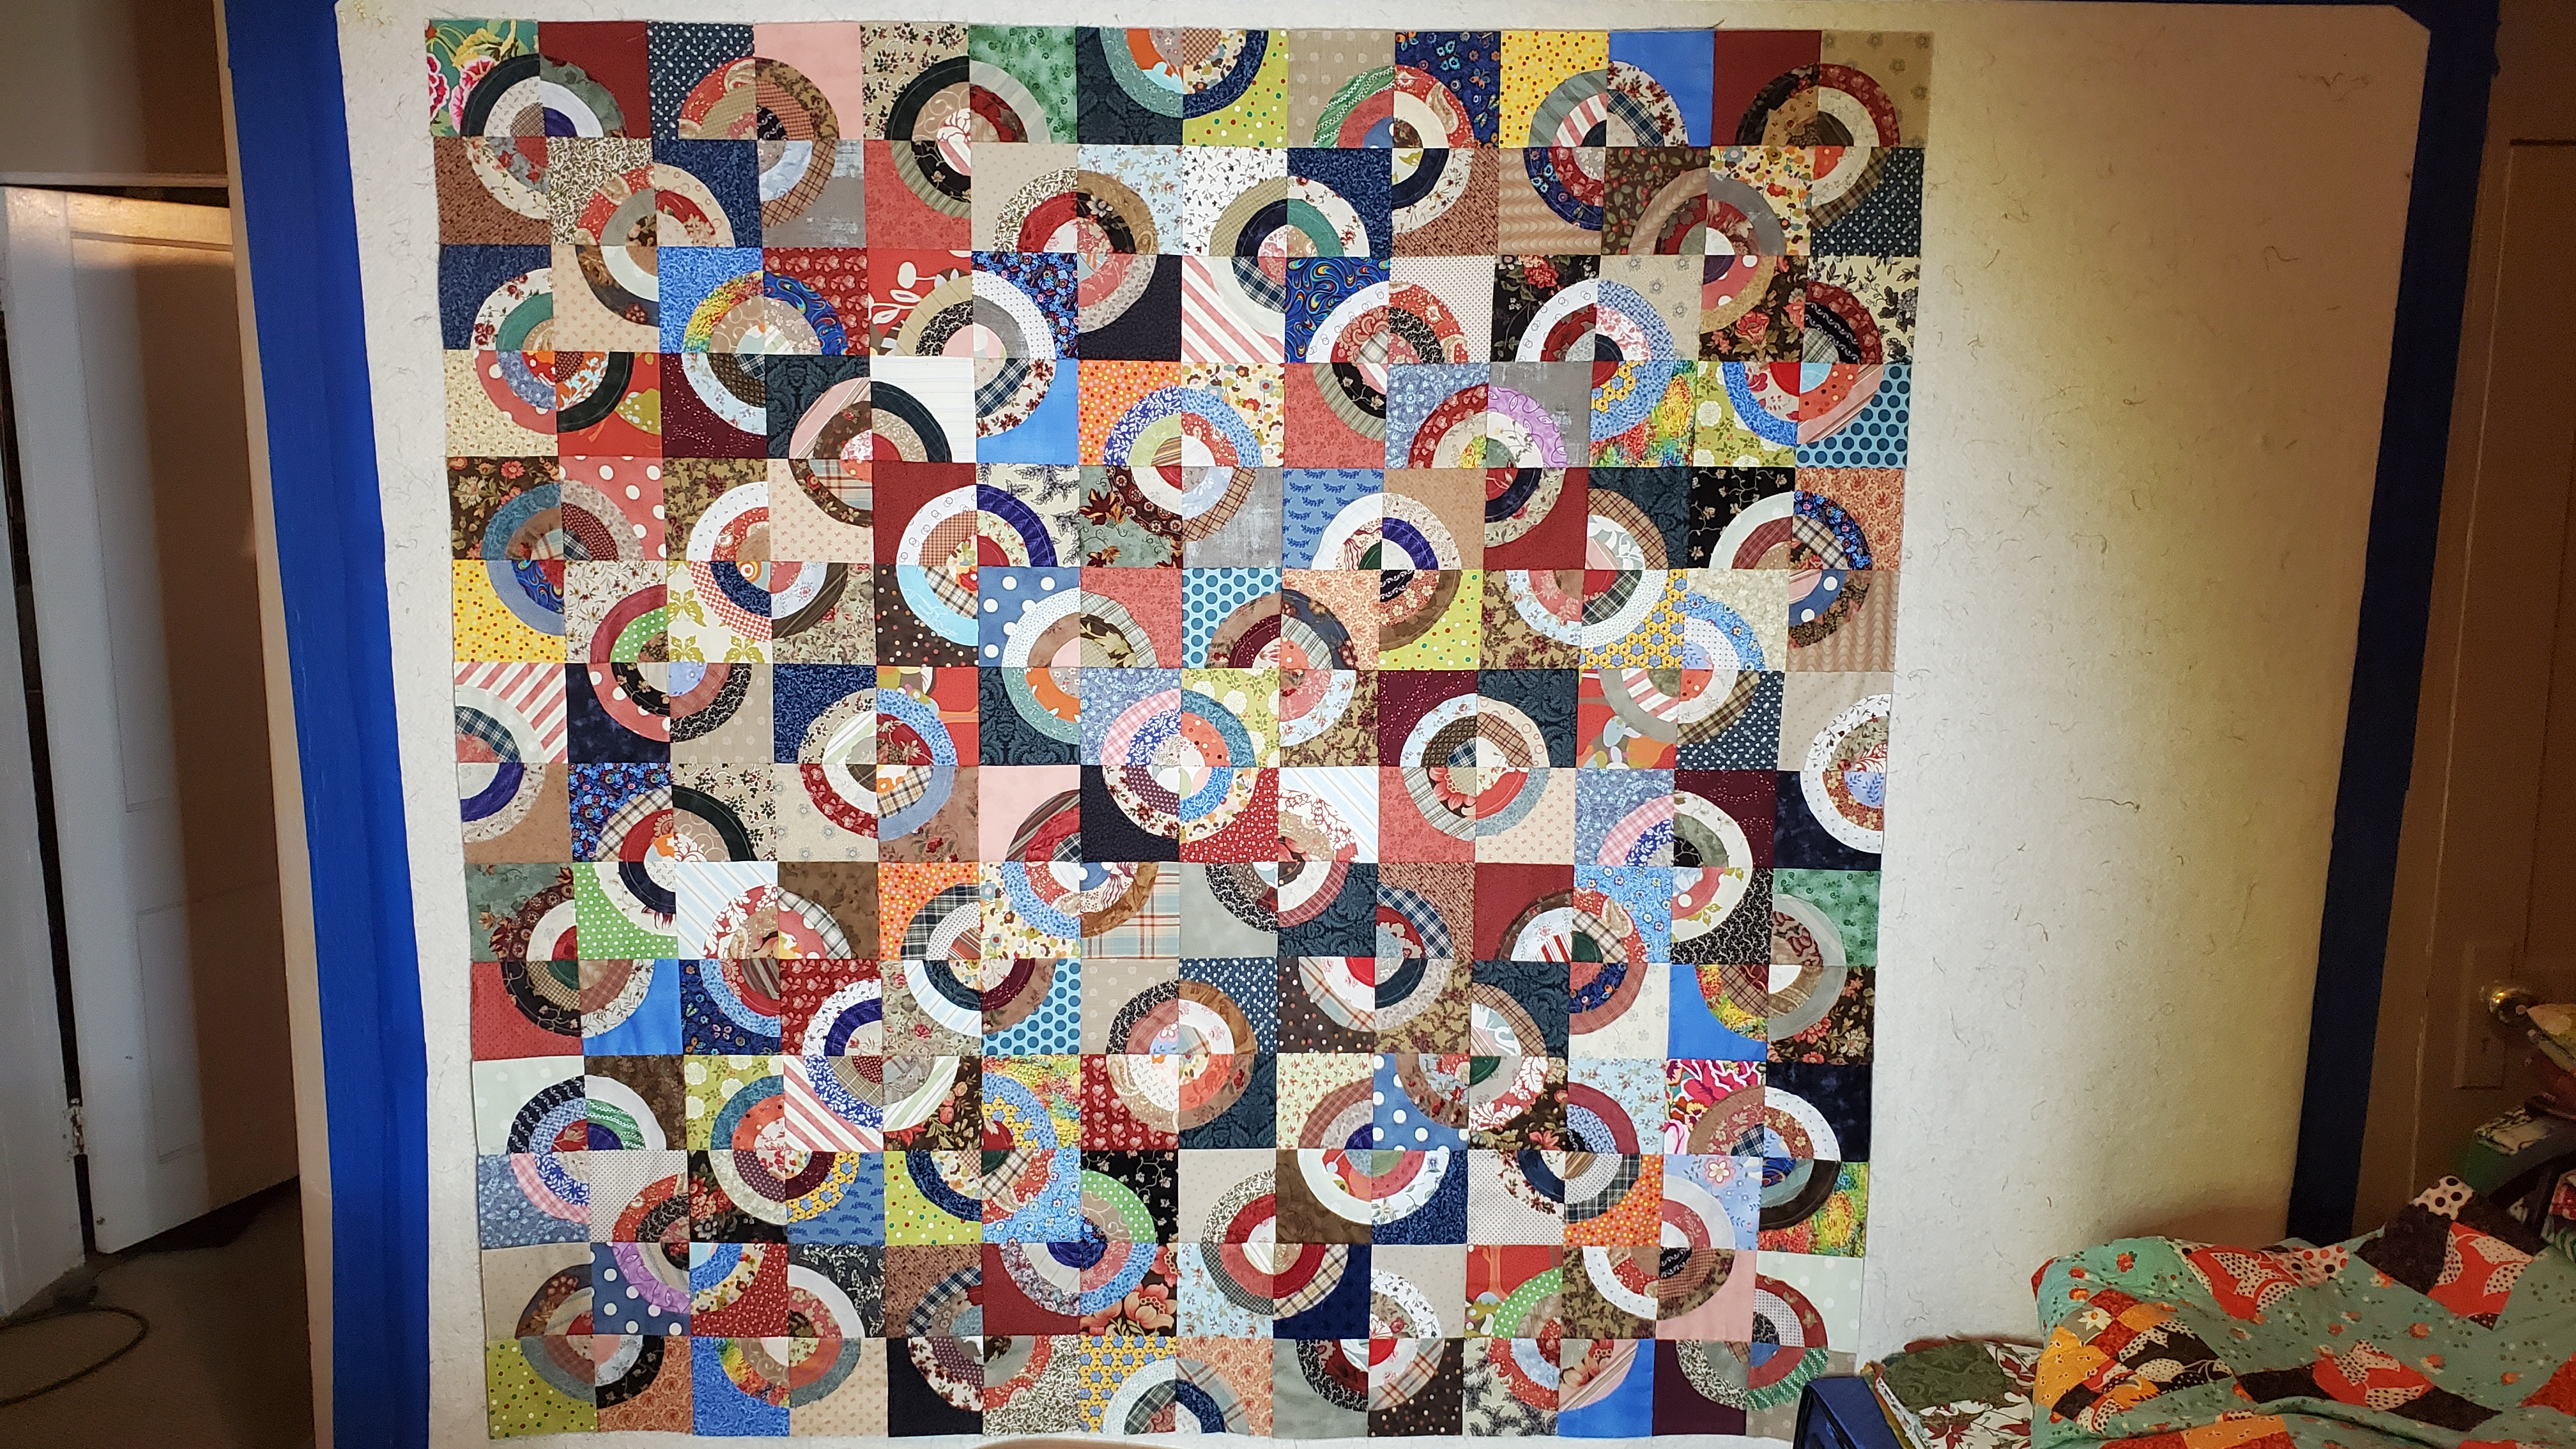
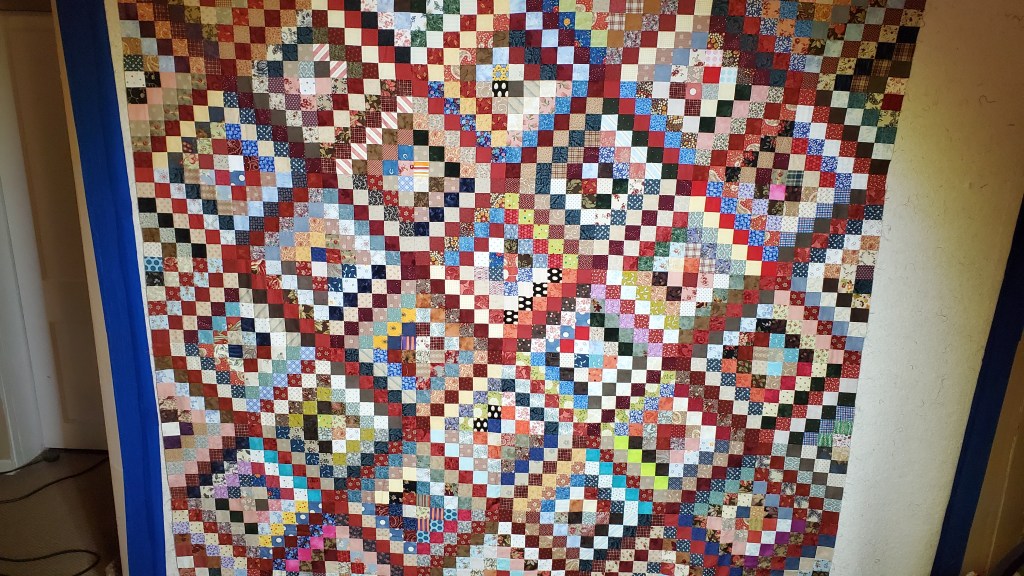
One of the very first quilts I ever made (I believe it was my 4th) was a bullseye quilt, pictured here. It still exists at my parents’ house.
Bullseye quilts are simple, sort of silly quilts to make. They’re wonderful for using up old scraps, and they’re sort of liberating because you don’t have to worry much about seam allowances or lining things up. They’re meant to be random and joyfully chaotic. And the process is a breeze:
Cut circles in three different sizes
Sew one to a background square, and then add the next two smaller circles on top of that.
Make sure to trim out the backs of everything as you go…except for the smallest circle on the top of the stack. This prevents lots of bulk when you sew everything back together.
Cut the blocks in quarters and mix them all up.
Re-sew four quarters into new, scrappy blocks.
In theory, you sew them back into complete circles, but as you can see, for most of them, I got a little whacky with it…which I hope you’ll enjoy!
The lighting is a little off/dark in a couple of these pictures…a couple have a true daylight lamp shining on them, and a couple don’t. Please know that they are all vibrant and (as promised) and joyfully chaotic.
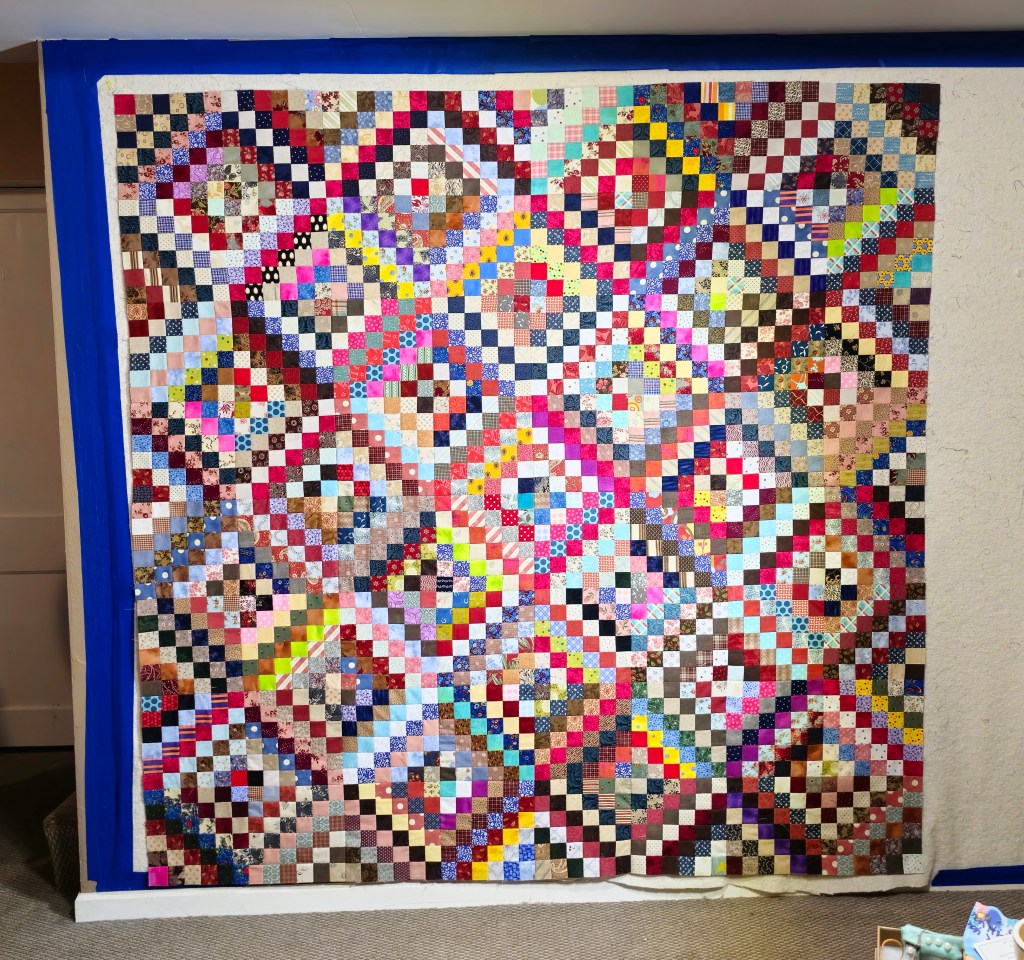
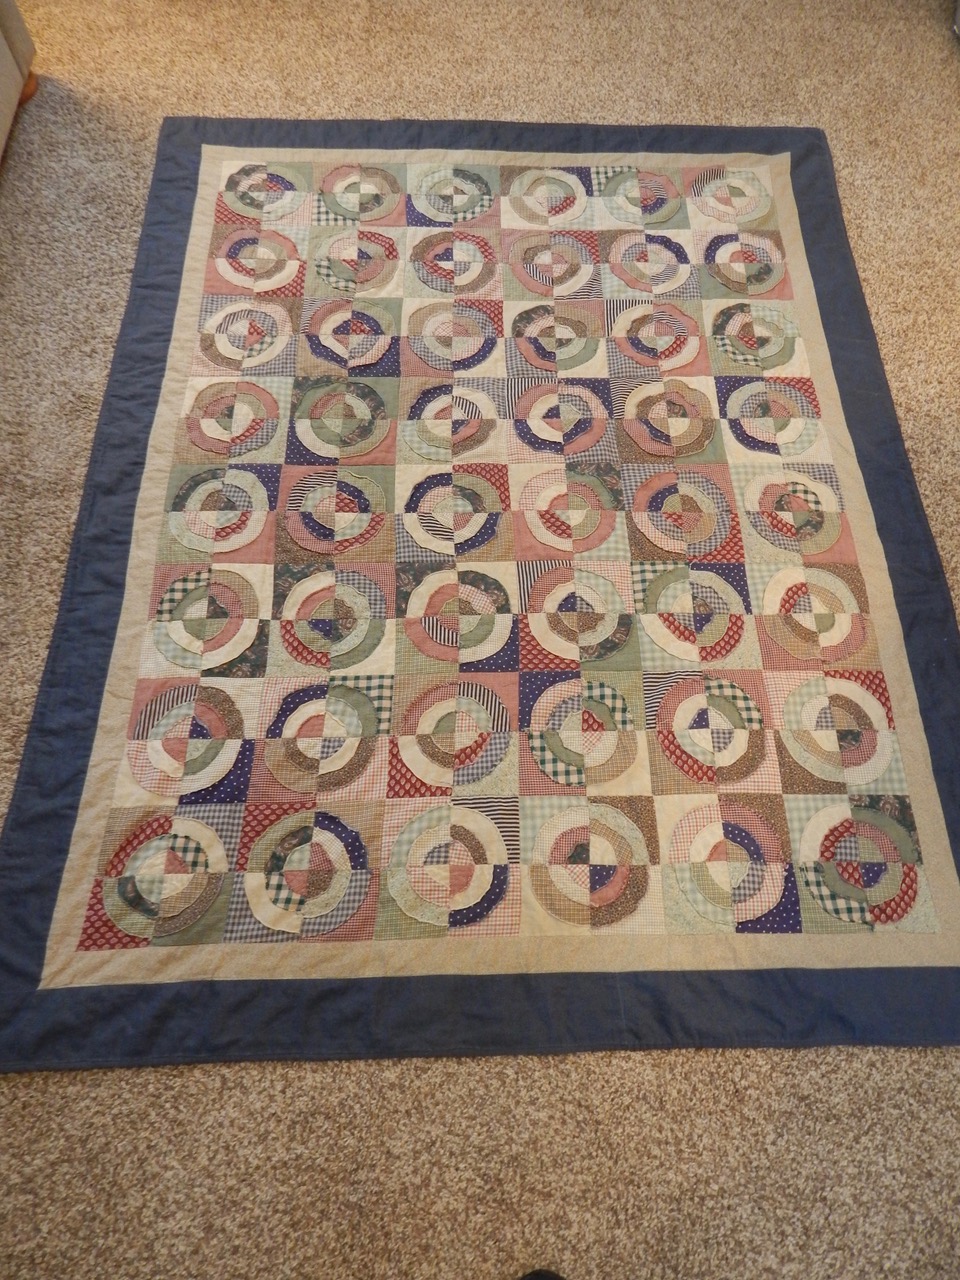
I now have five completed quilt tops! Two more to go, if I want to honor my commitment to seven total. We’ll see if I make it! I may have to take a break from piecing and switch to quilting, just so I feel like I’m making progress by actually completing things. I think it’s going to happen! There’s really going to be a quilt auction!
Stumbling across an old scrap of a favorite fabric is a trip back in time. To other quilts. To other aesthetic phases. Sometimes you’re super impressed with the consistency of your excellent taste over time…and sometimes it’s like finding an old photo of yourself in some bangin’ 90’s fashion.
Sigh.
Anyway, from time to time I’m going to post photos of scraps (featured in these very quilts you’ll be bidding on!) that were either plain old all-time favorites, or scraps that were significant in some way.
To kick off this celebration of great fabrics, let’s start at the beginning! The first picture in this post is of the absolute last remaining scraps of fabric from the very first quilt I ever made. That’s it. That’s all that’s left.
This dusty green tone-on-tone floral print was purchased in the fall of 1999 at Quilts by the Falls in Cannon Falls, Minnesota…the shop where I learned how to quilt. My teacher was a woman named Jane Peterson (pictured in the second photo, in the foreground wearing the indigo jacket…the background of the photo is the lap quilt she gave us for our wedding), and I will always be deeply grateful for the introduction she gave me to this amazing hobby. Jane taught a wonderful beginner’s quilting class where we all made 9-patch lap quilts. I remember that while Jane certainly encouraged us to do good work and learn how to do things correctly, she also made the process fun and didn’t over-stress perfection. She taught me the “riding by on a horse test.” As in, “if you were riding by on a horse, would you notice the mistake? No? Then let it go.” Right from the beginning, Jane made sure we were enjoying the process of quilting.
But why I picked the colors I picked, I’ll never know. I’ve never been a fan of whatever that green is. Yeesh.
Speaking of getting comfortable with NOT doing things perfectly, here’s a confession about my first quilt (final picture in this post):
I messed it up before I even really got started. It was supposed to be a simple, two-color 9-patch. Classic and uncomplicated…cream print with a green chain running through. But when I was cutting the fabric, I messed up. I cut big dusty green squares with a cream print chain runing through instead of the other way around. So I had to add in a 3rd color…the dark green border. Oh well. Nice to get that first big fuck up out of the way right from the get-go.
Look for those last scraps of dusty green in the bullseye quilts. You’ll have one of the very last pieces of where this whole wonderful adventure began!
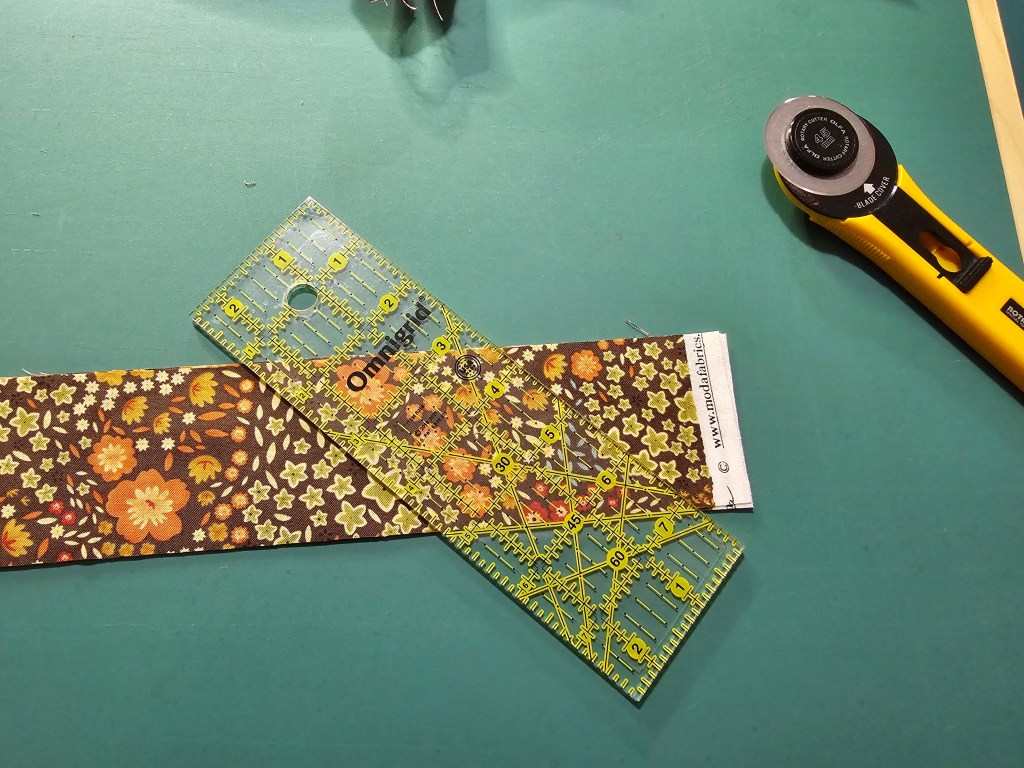
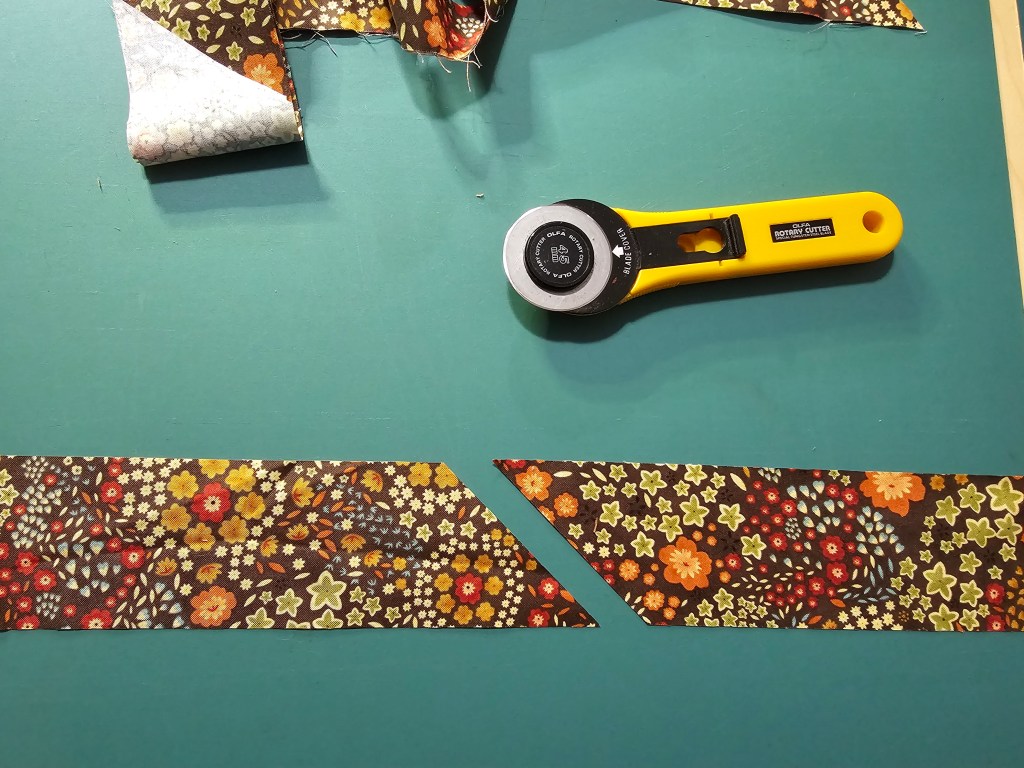
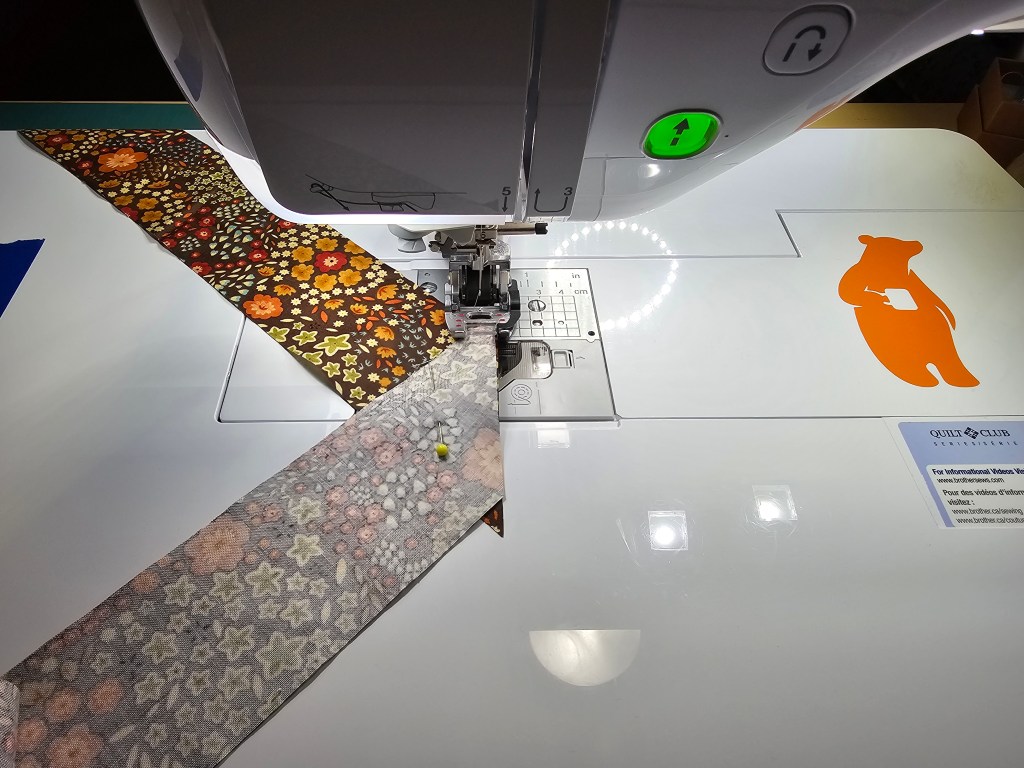
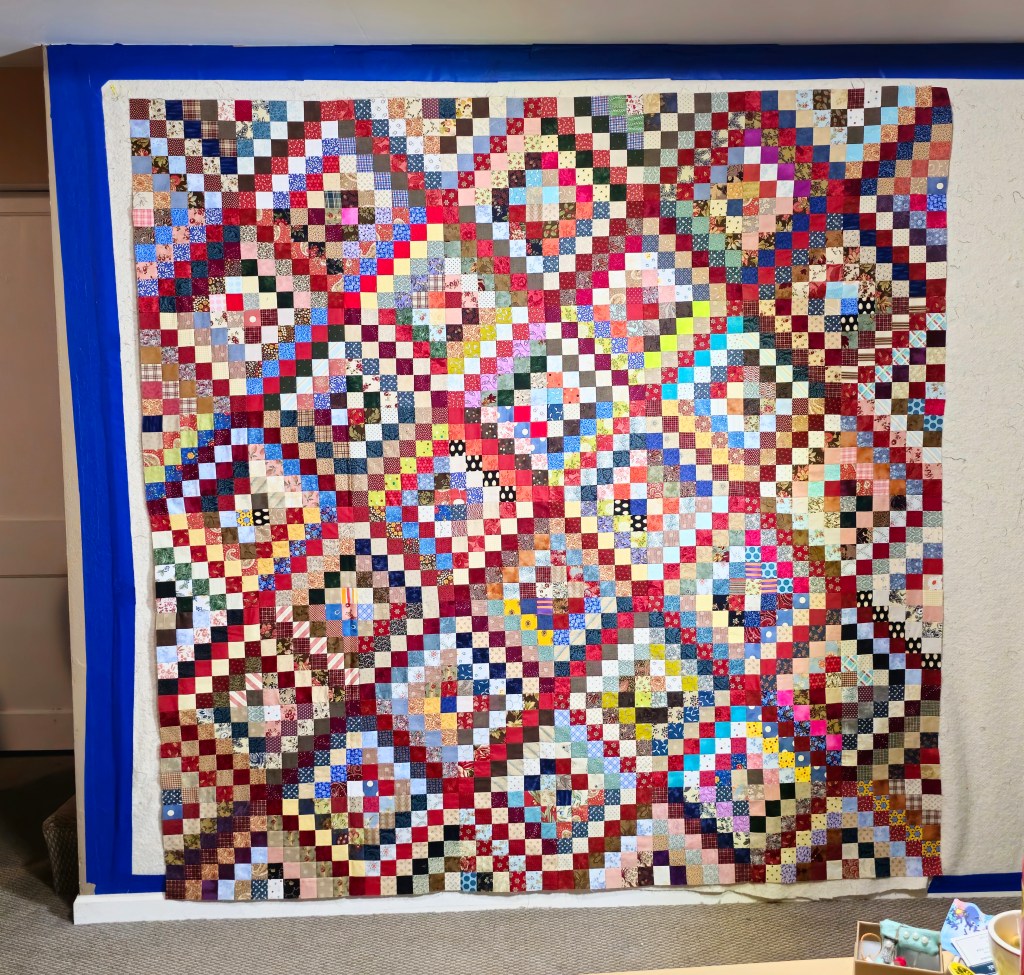
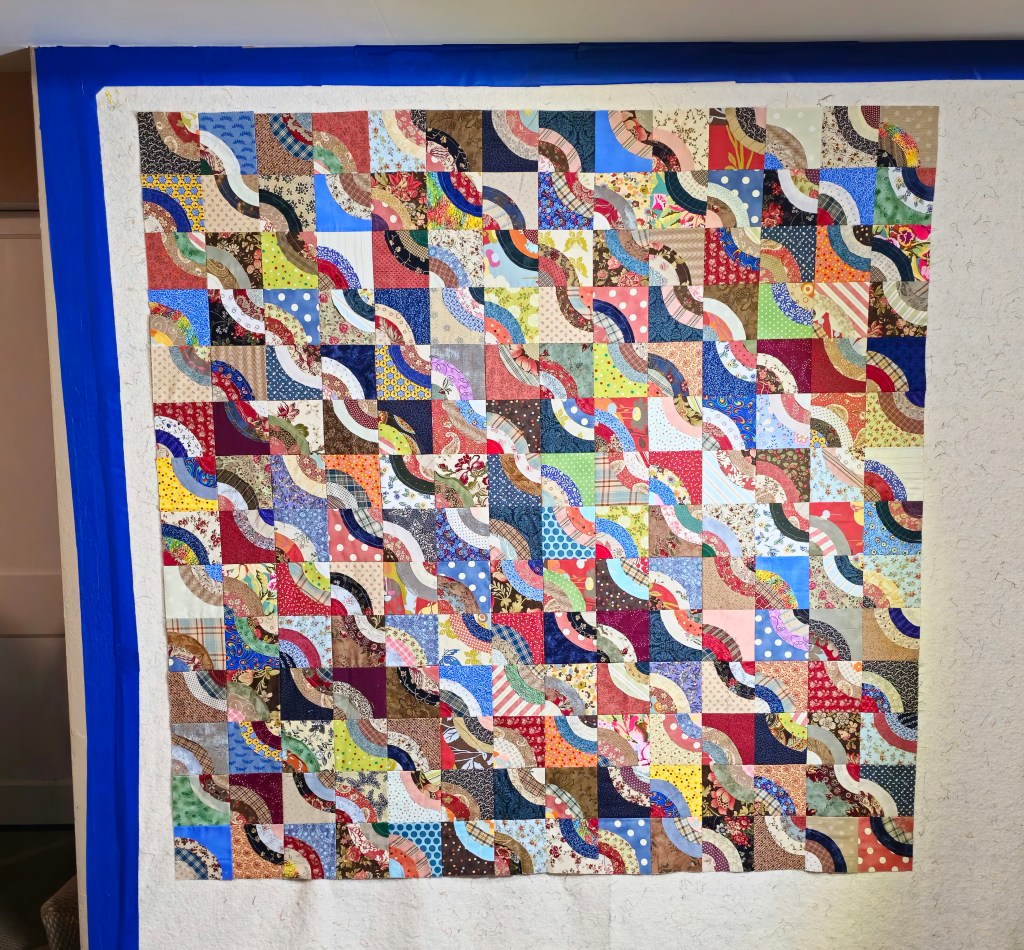
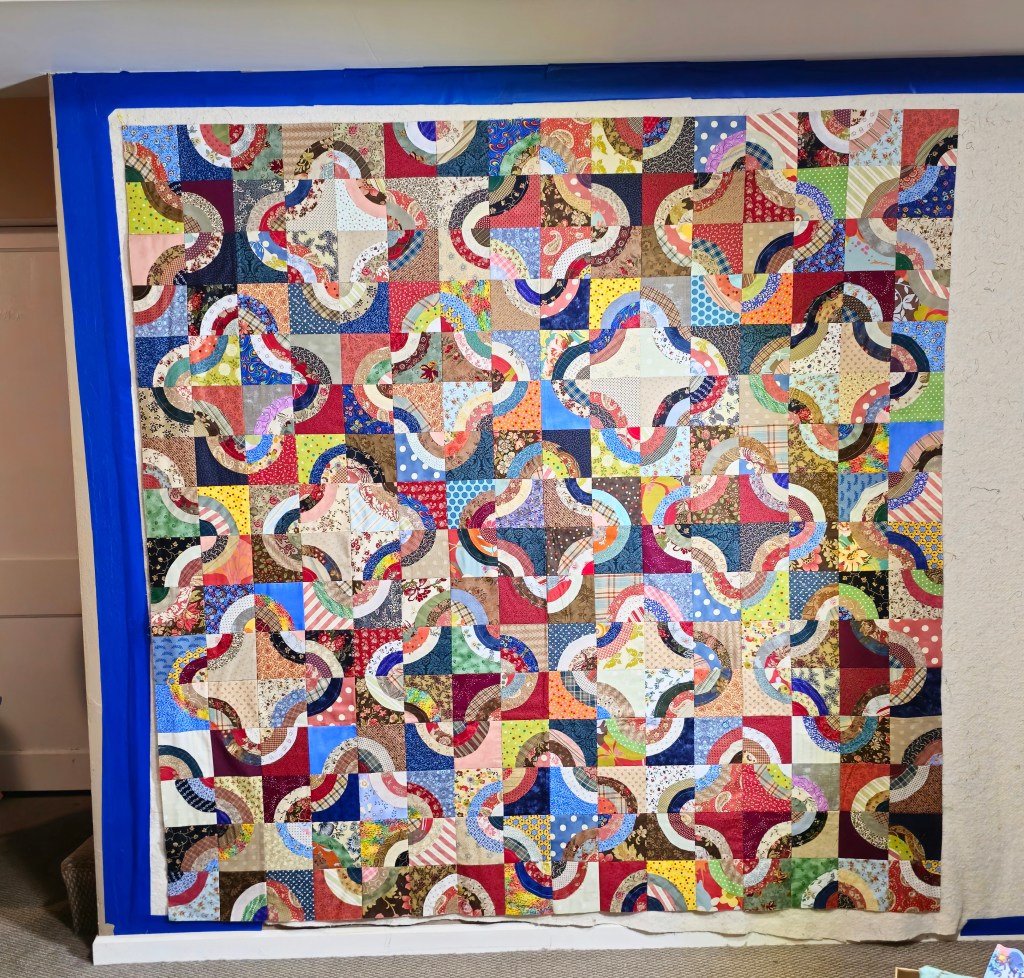
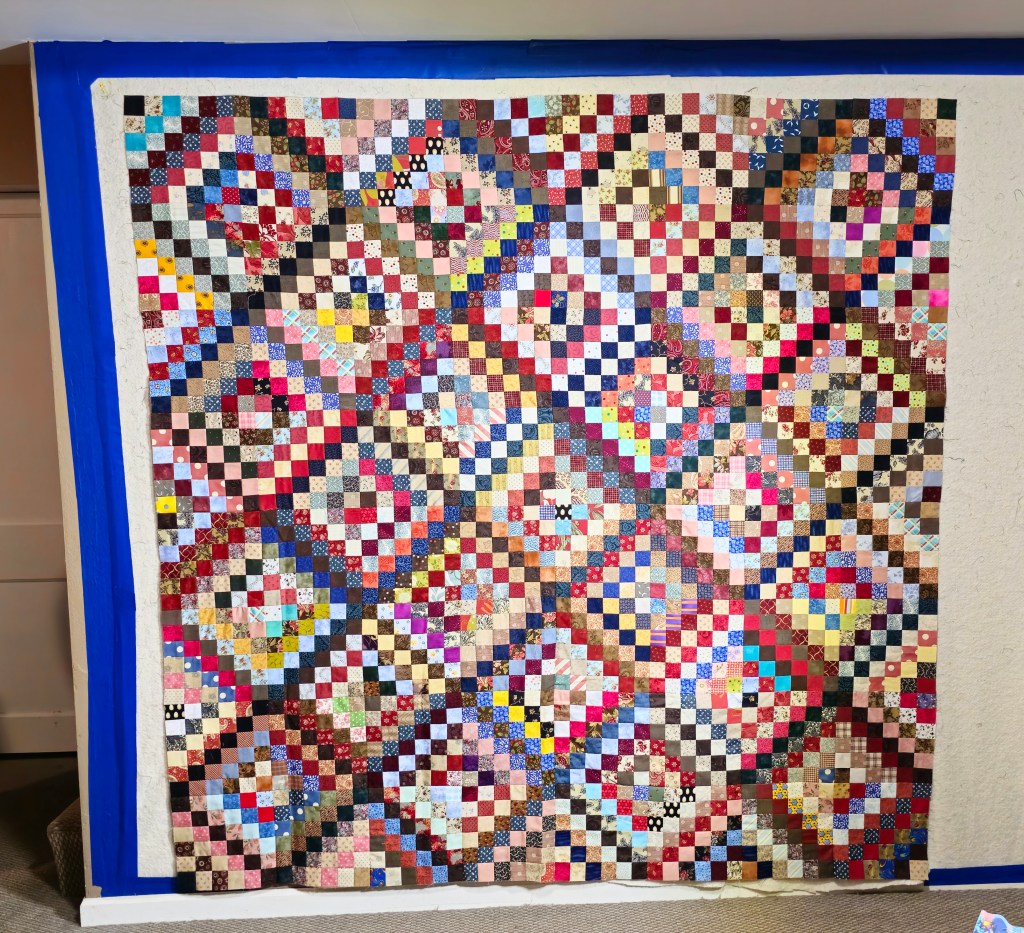
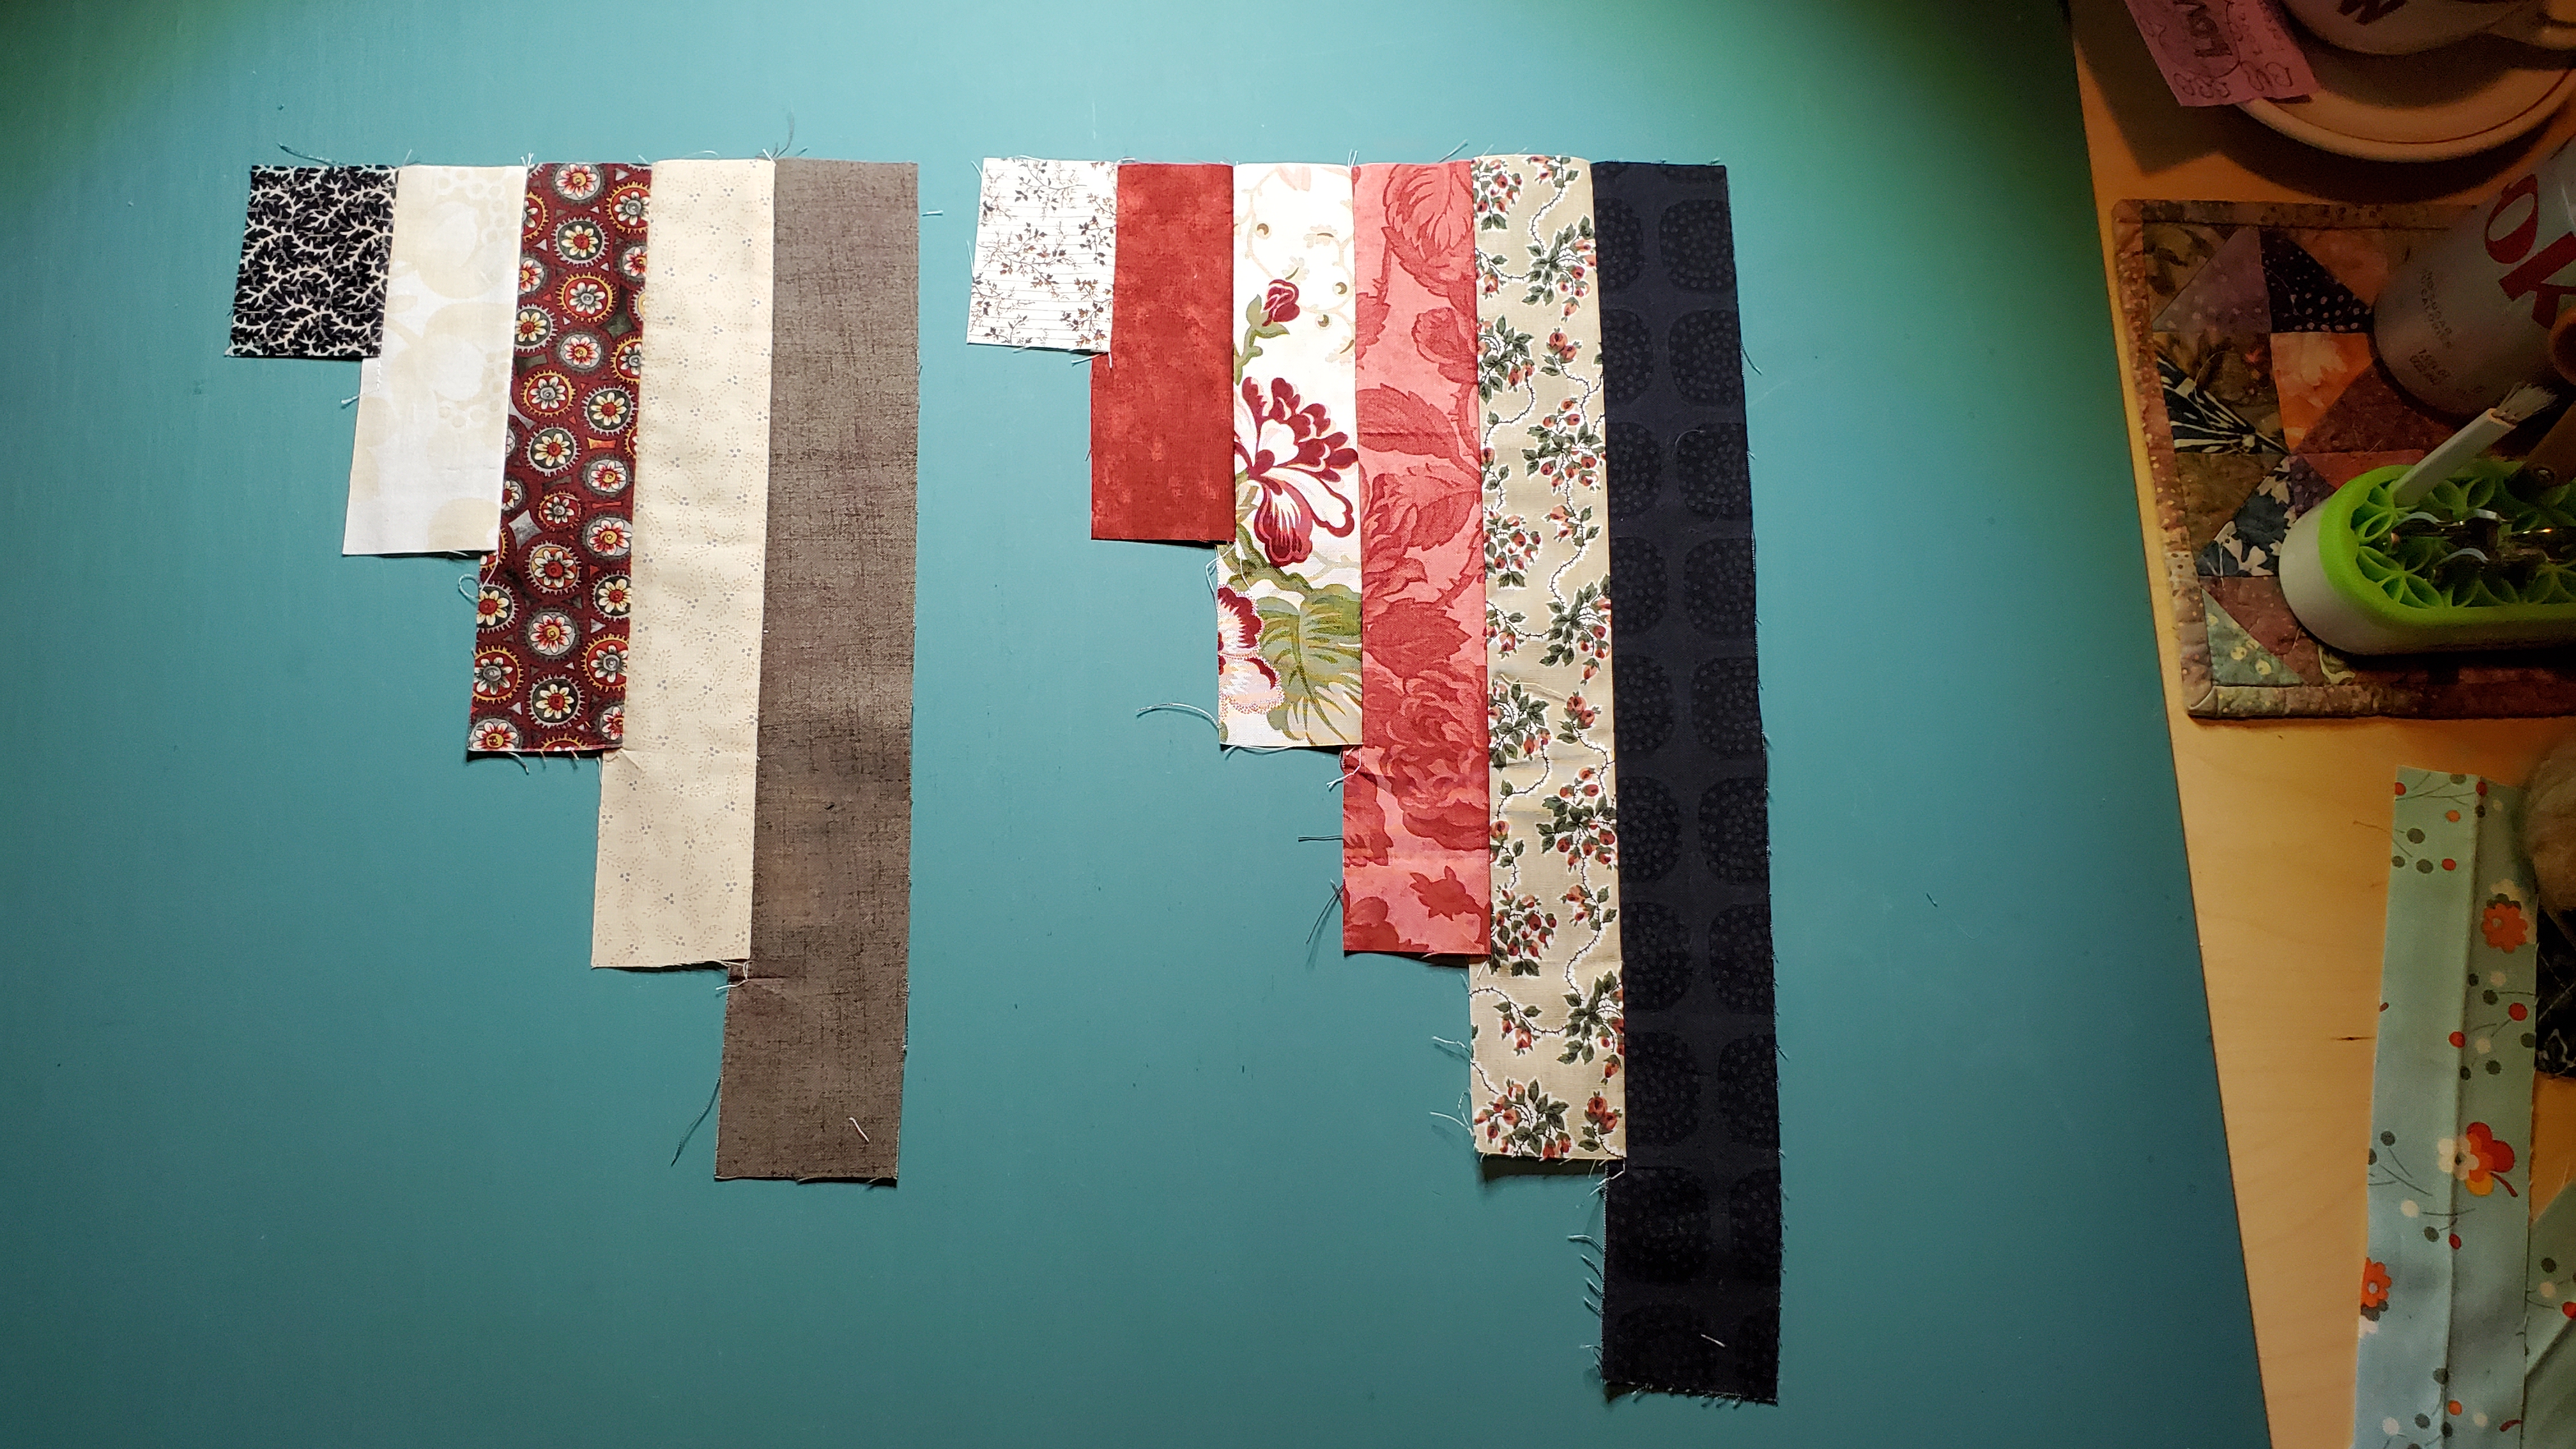
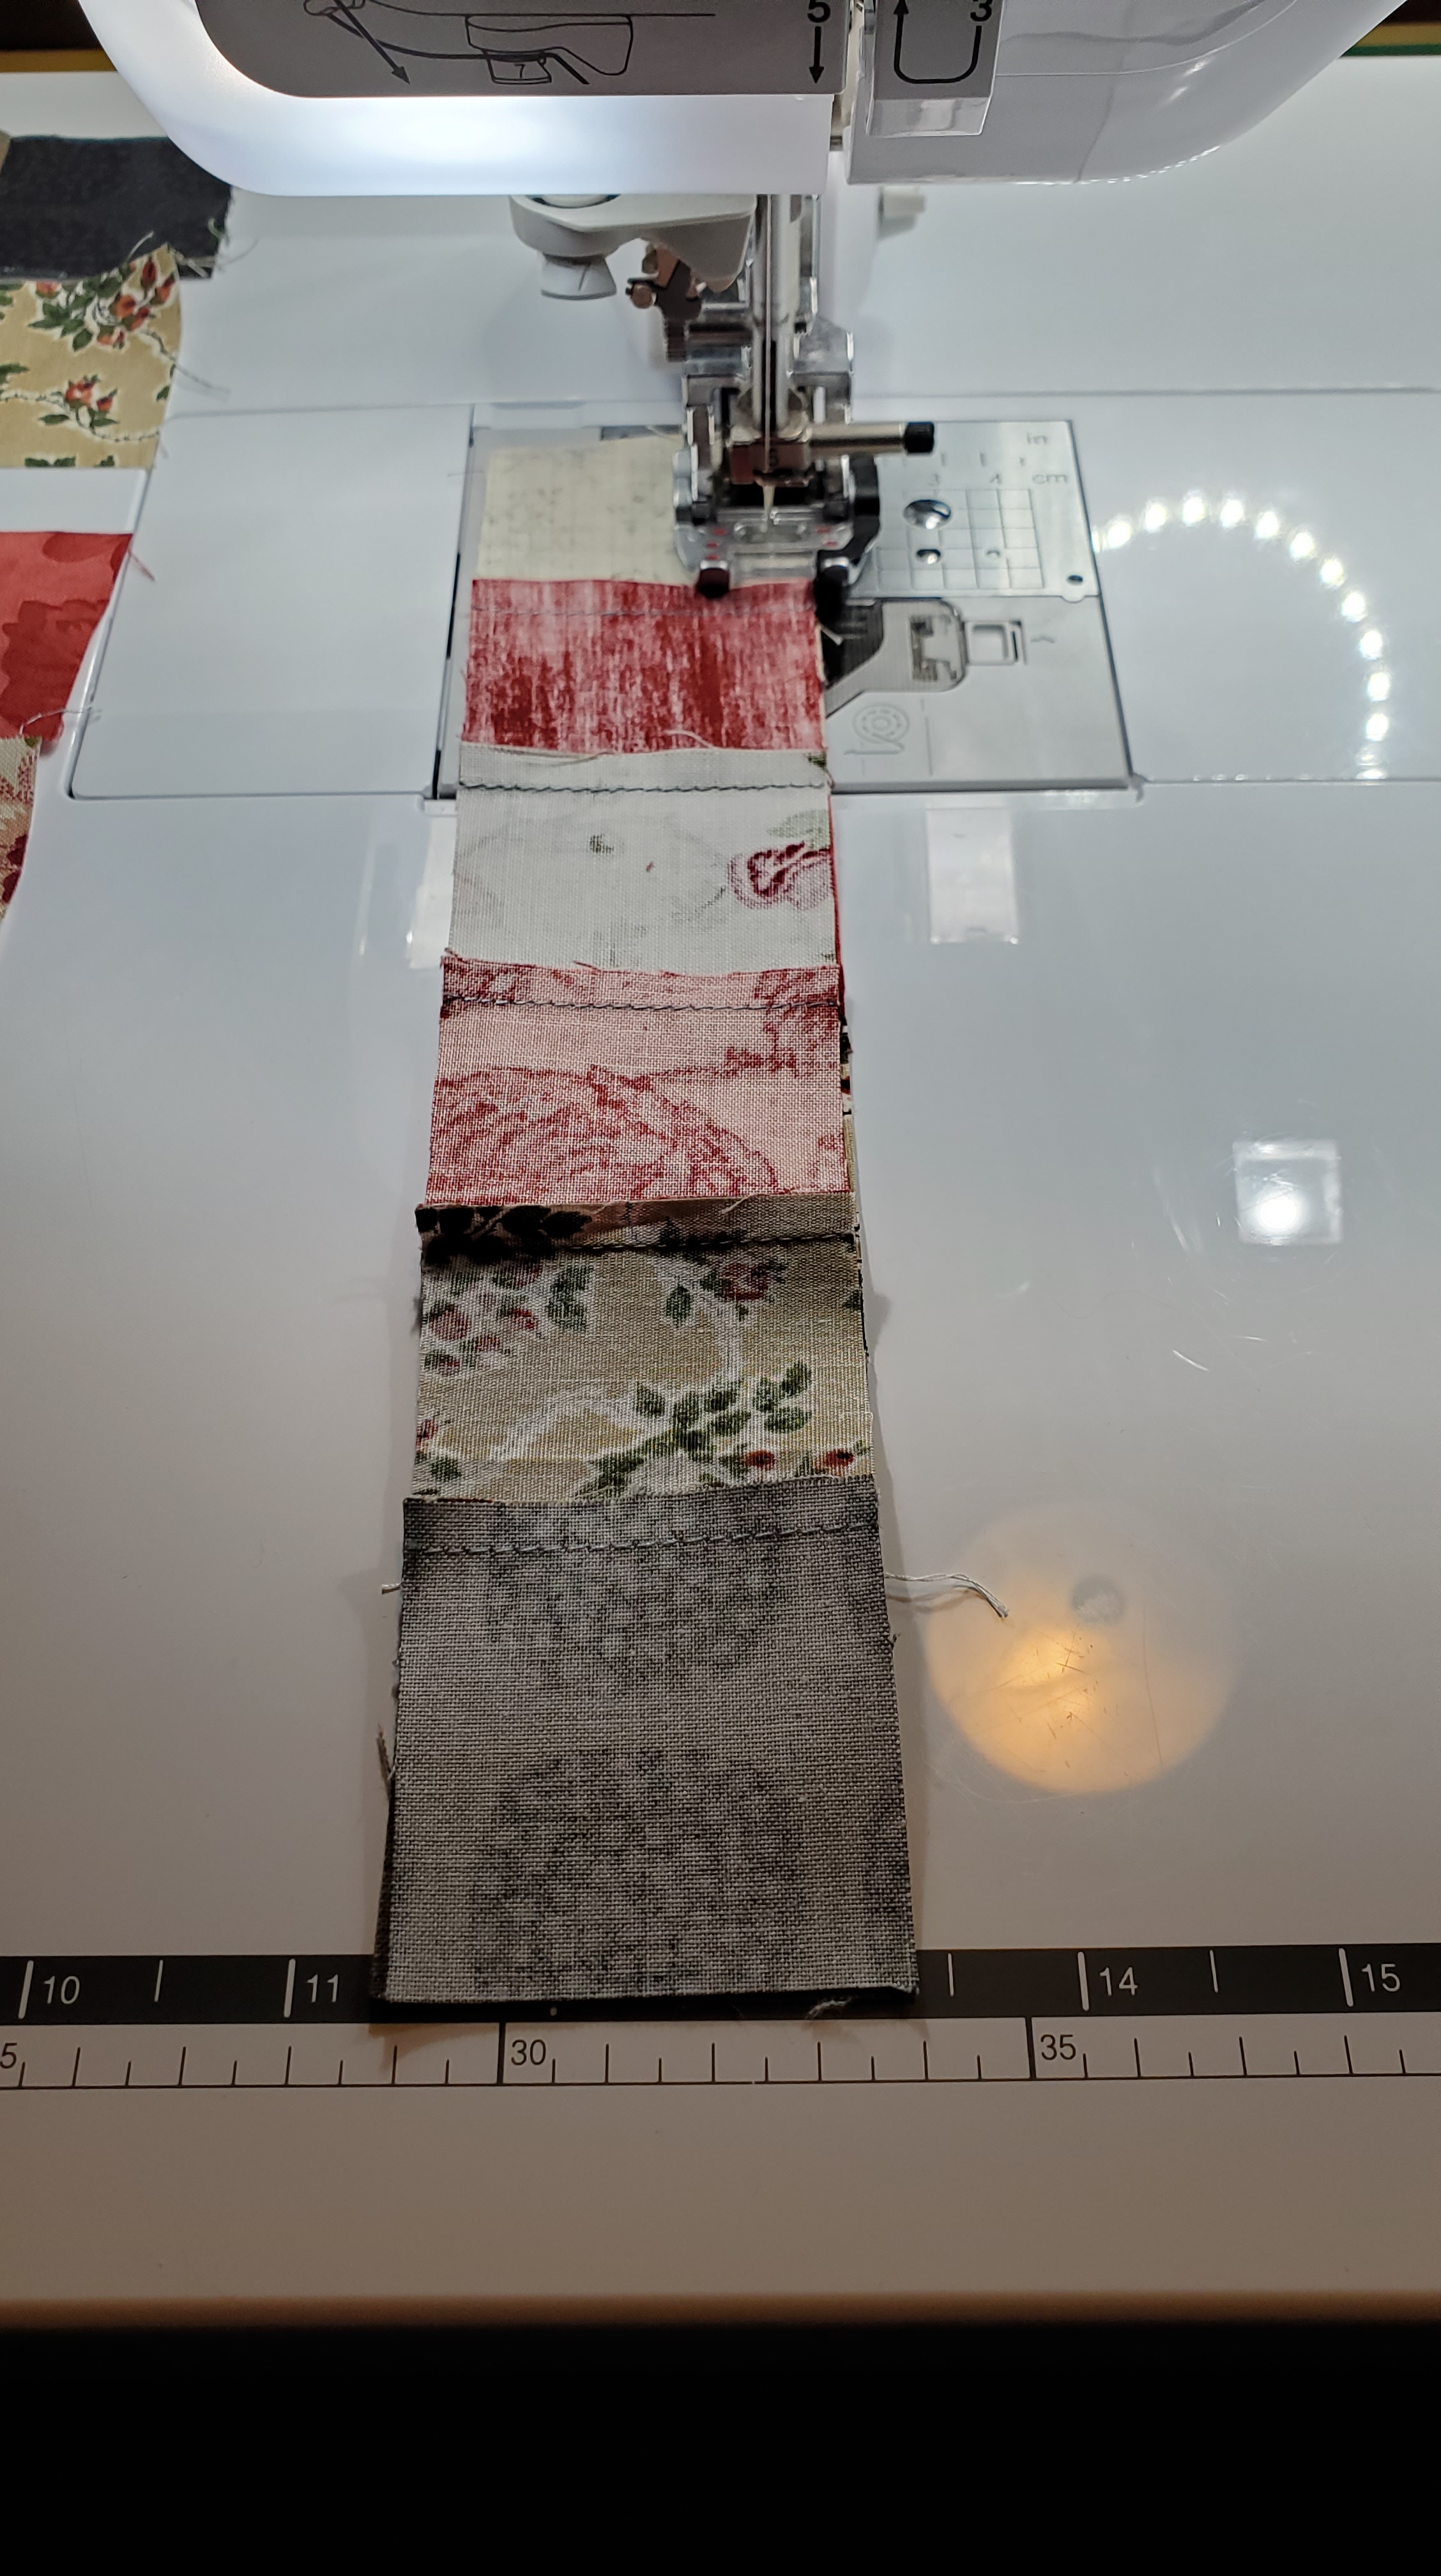
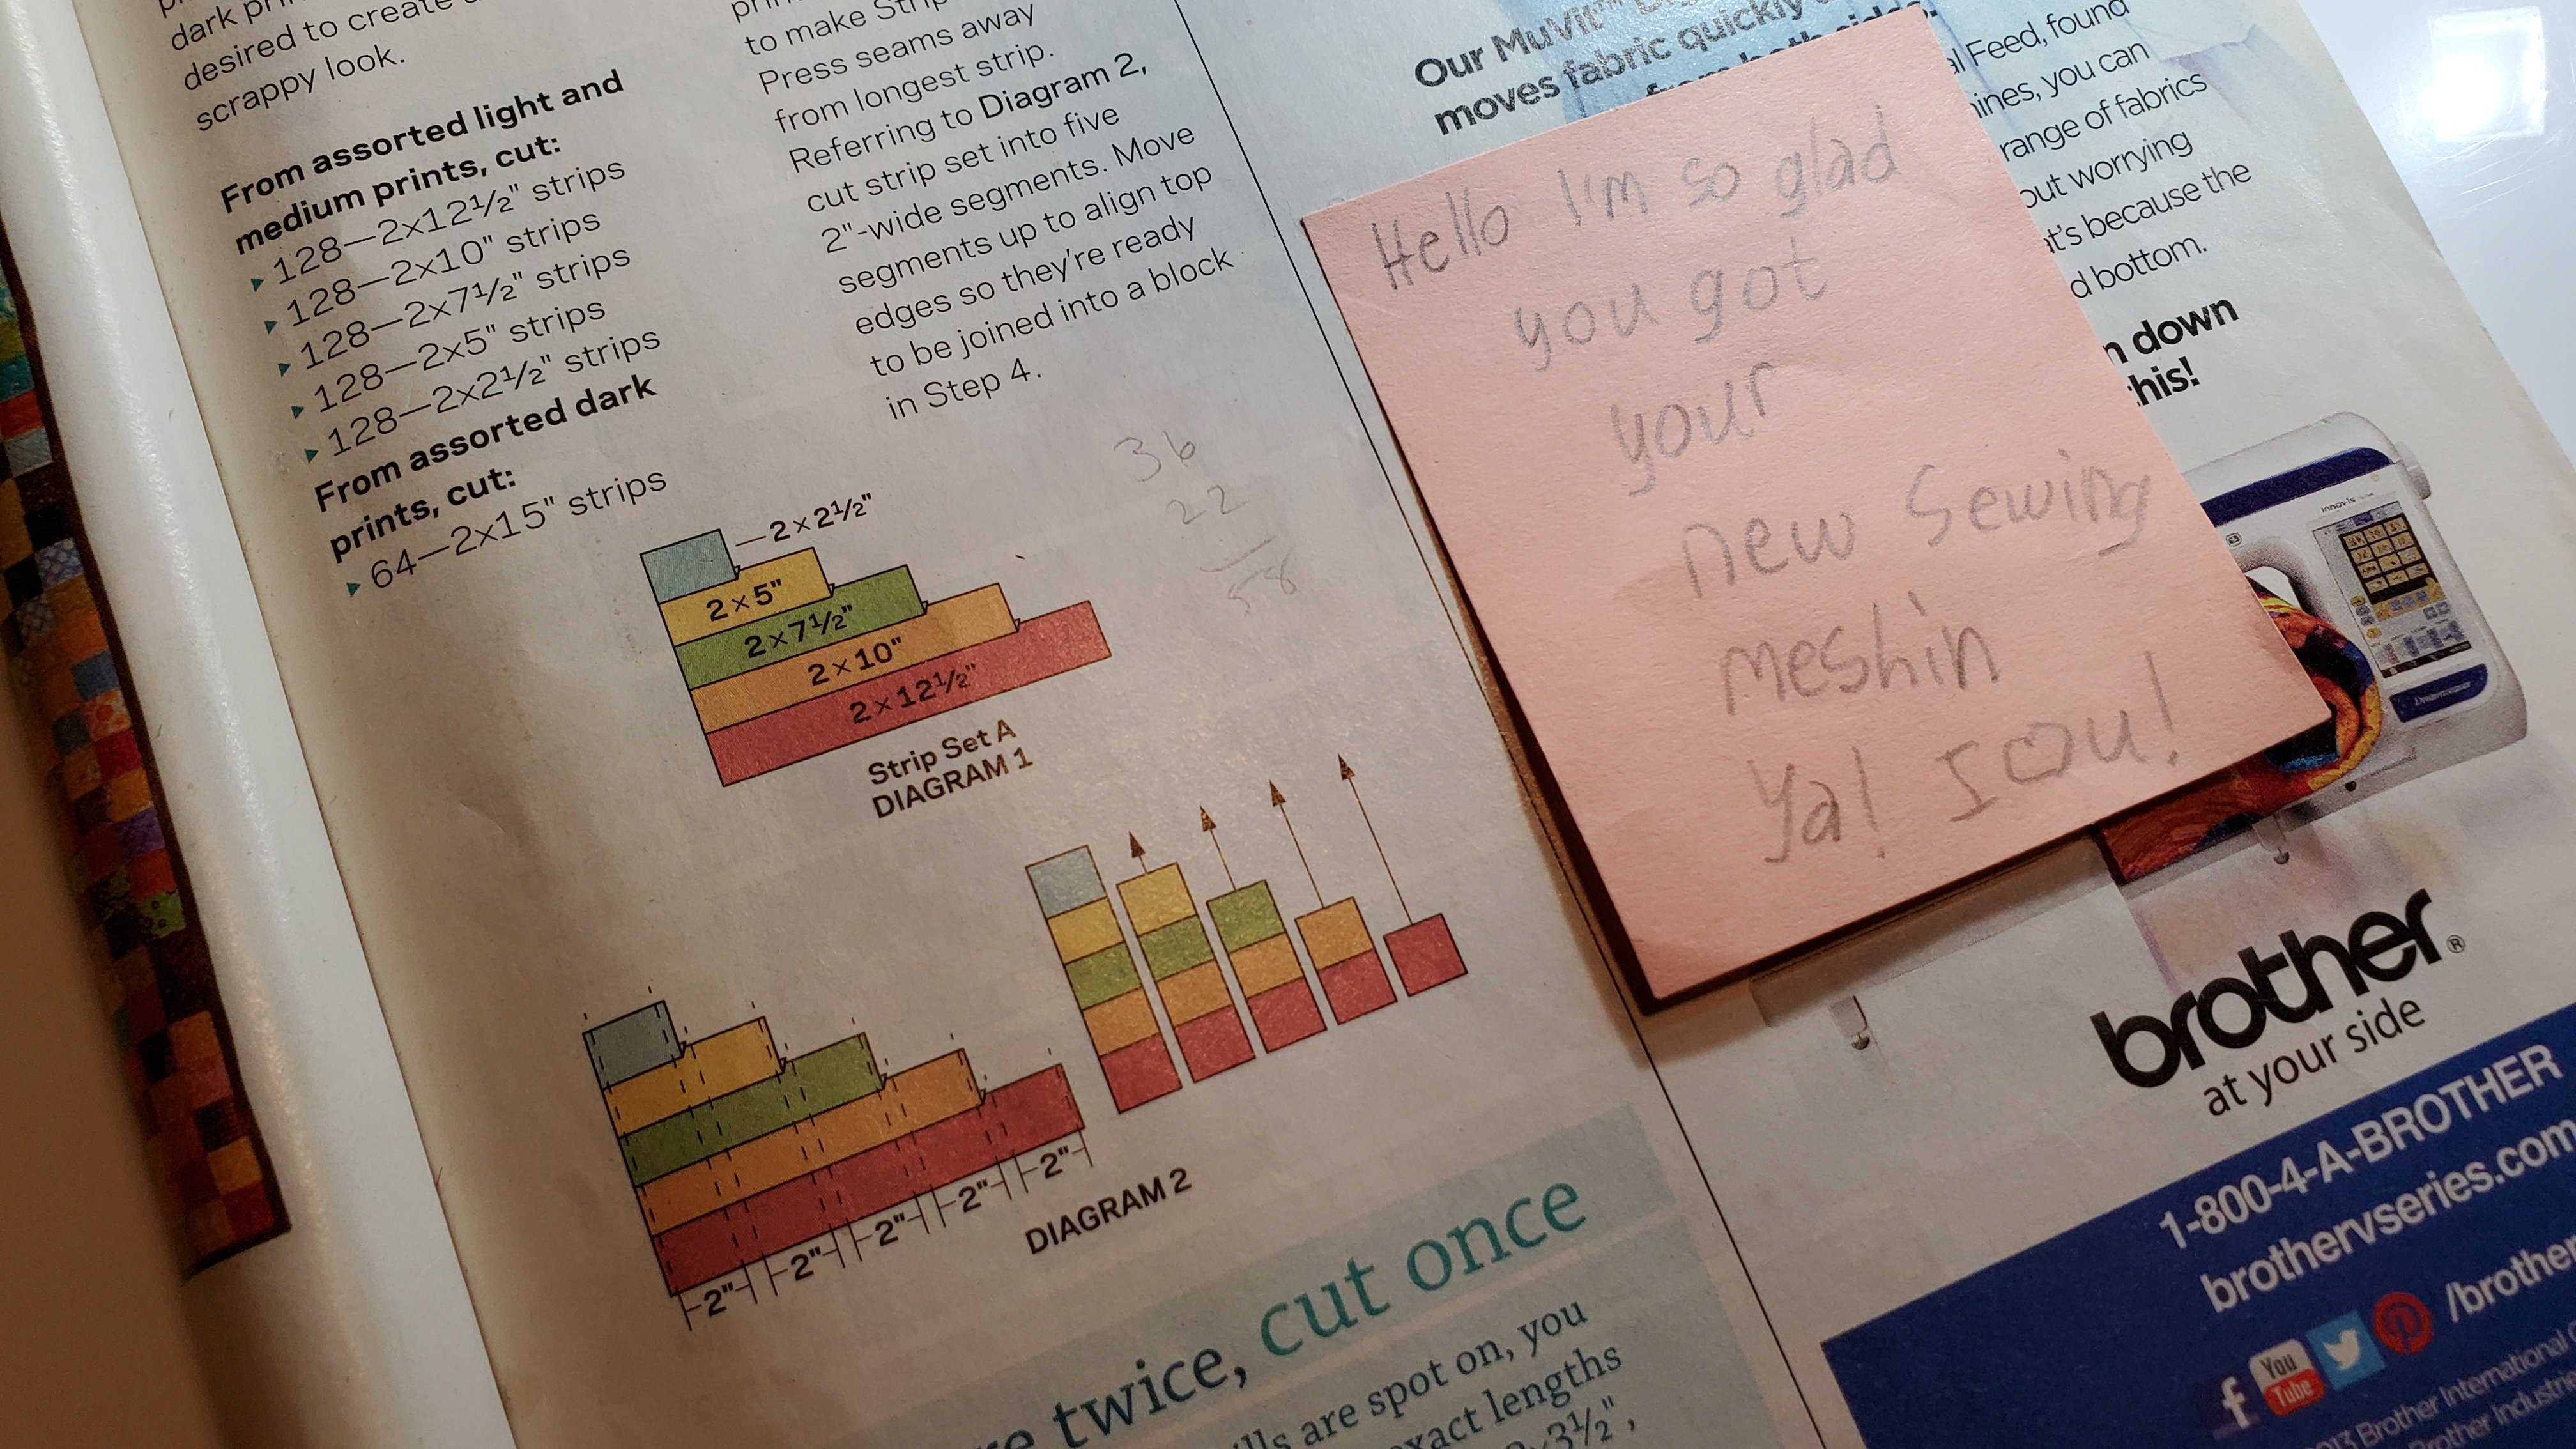
How do you turn stacks and stacks (and stacks) of 2” strips into a quilt inspired by those crocheted granny square blankets? Let me tell you…it was a journey. When I started working on this quilt, I knew it would be involved…but my ambition got in the way of doing the math of involved x 3. I didn’t think… I just dove in and started cutting fabric for 3 quilts. Seeing that each quilt consists of…
128 2” x” 12 ½” strips
128 2” x” 10” strips
128 2” x” 7 ½” strips
128 2” x” 5” strips
128 2” x” 2 ½” strips
64 2” x” 15” strips
…I guess it was better that I leapt before I looked. [grimacing emoji]
Anyway.
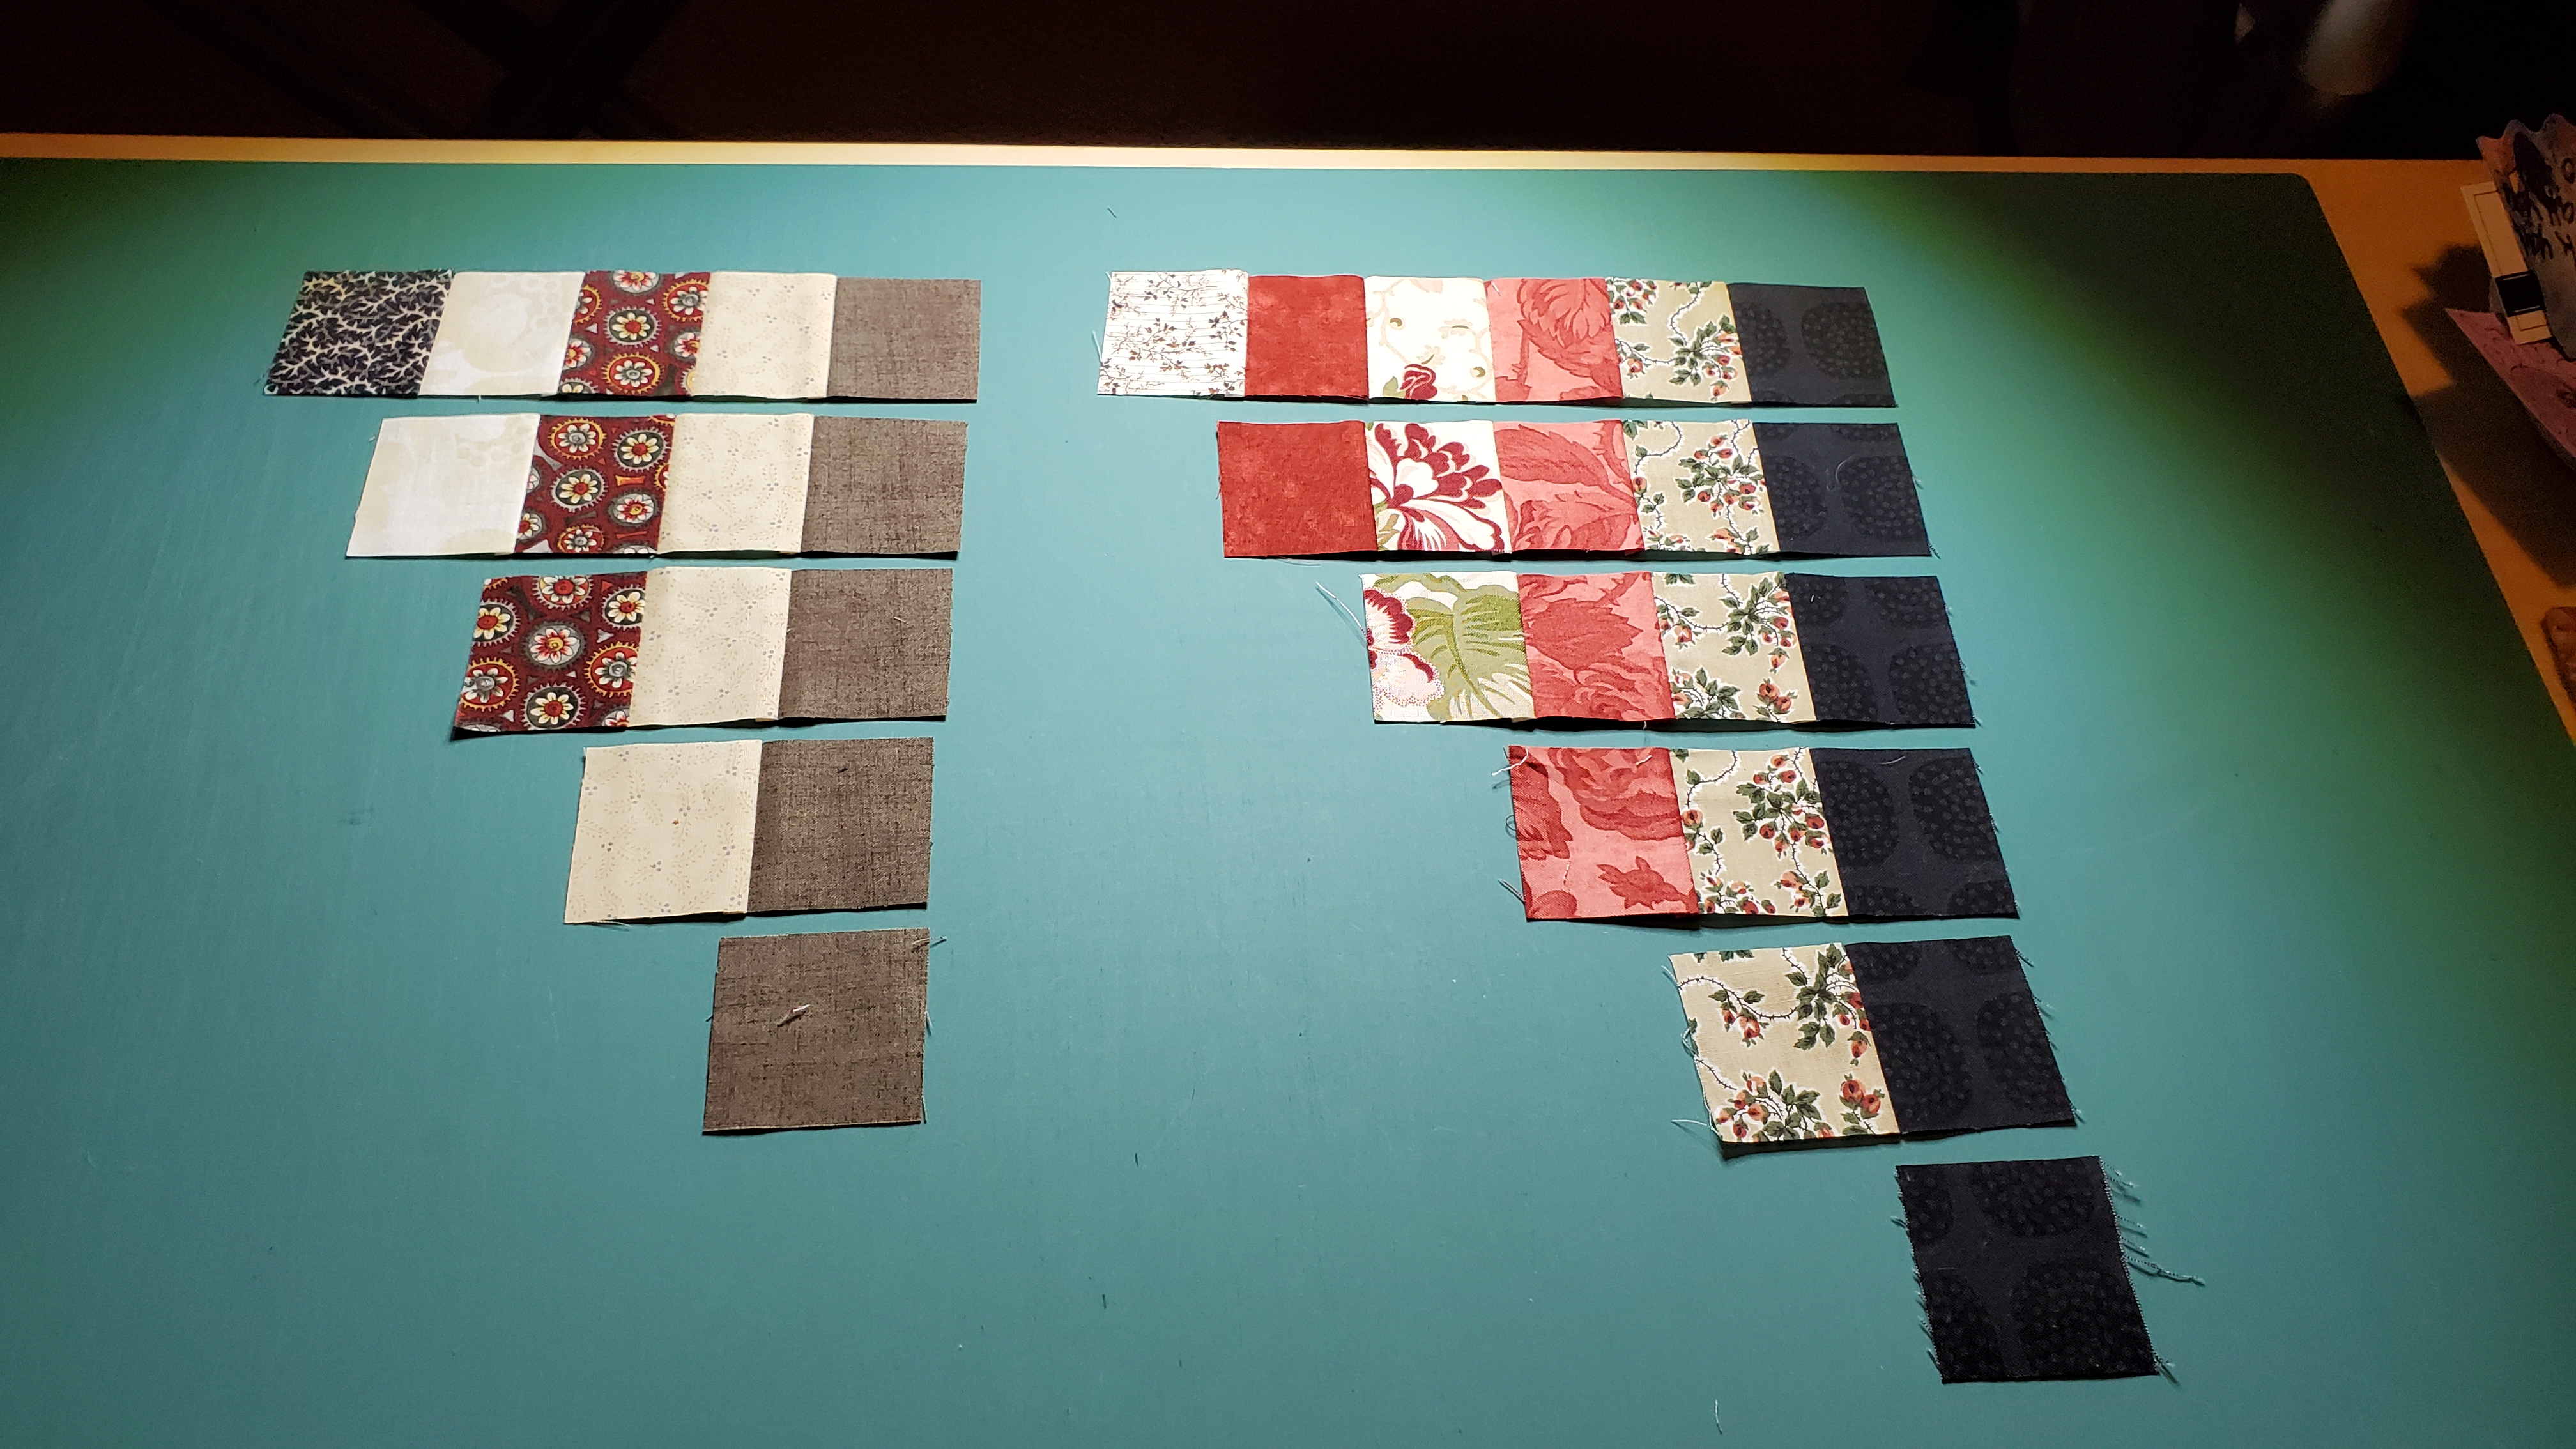
This quilt (from the April 2013 issue of American Patchwork and Quilting magazine) involves taking the 2” strips mentioned above and:
sewing them into strip sets A and B
cross-cutting both strip sets into 2” segments
matching up the segments from strip set A with segments from strip set B
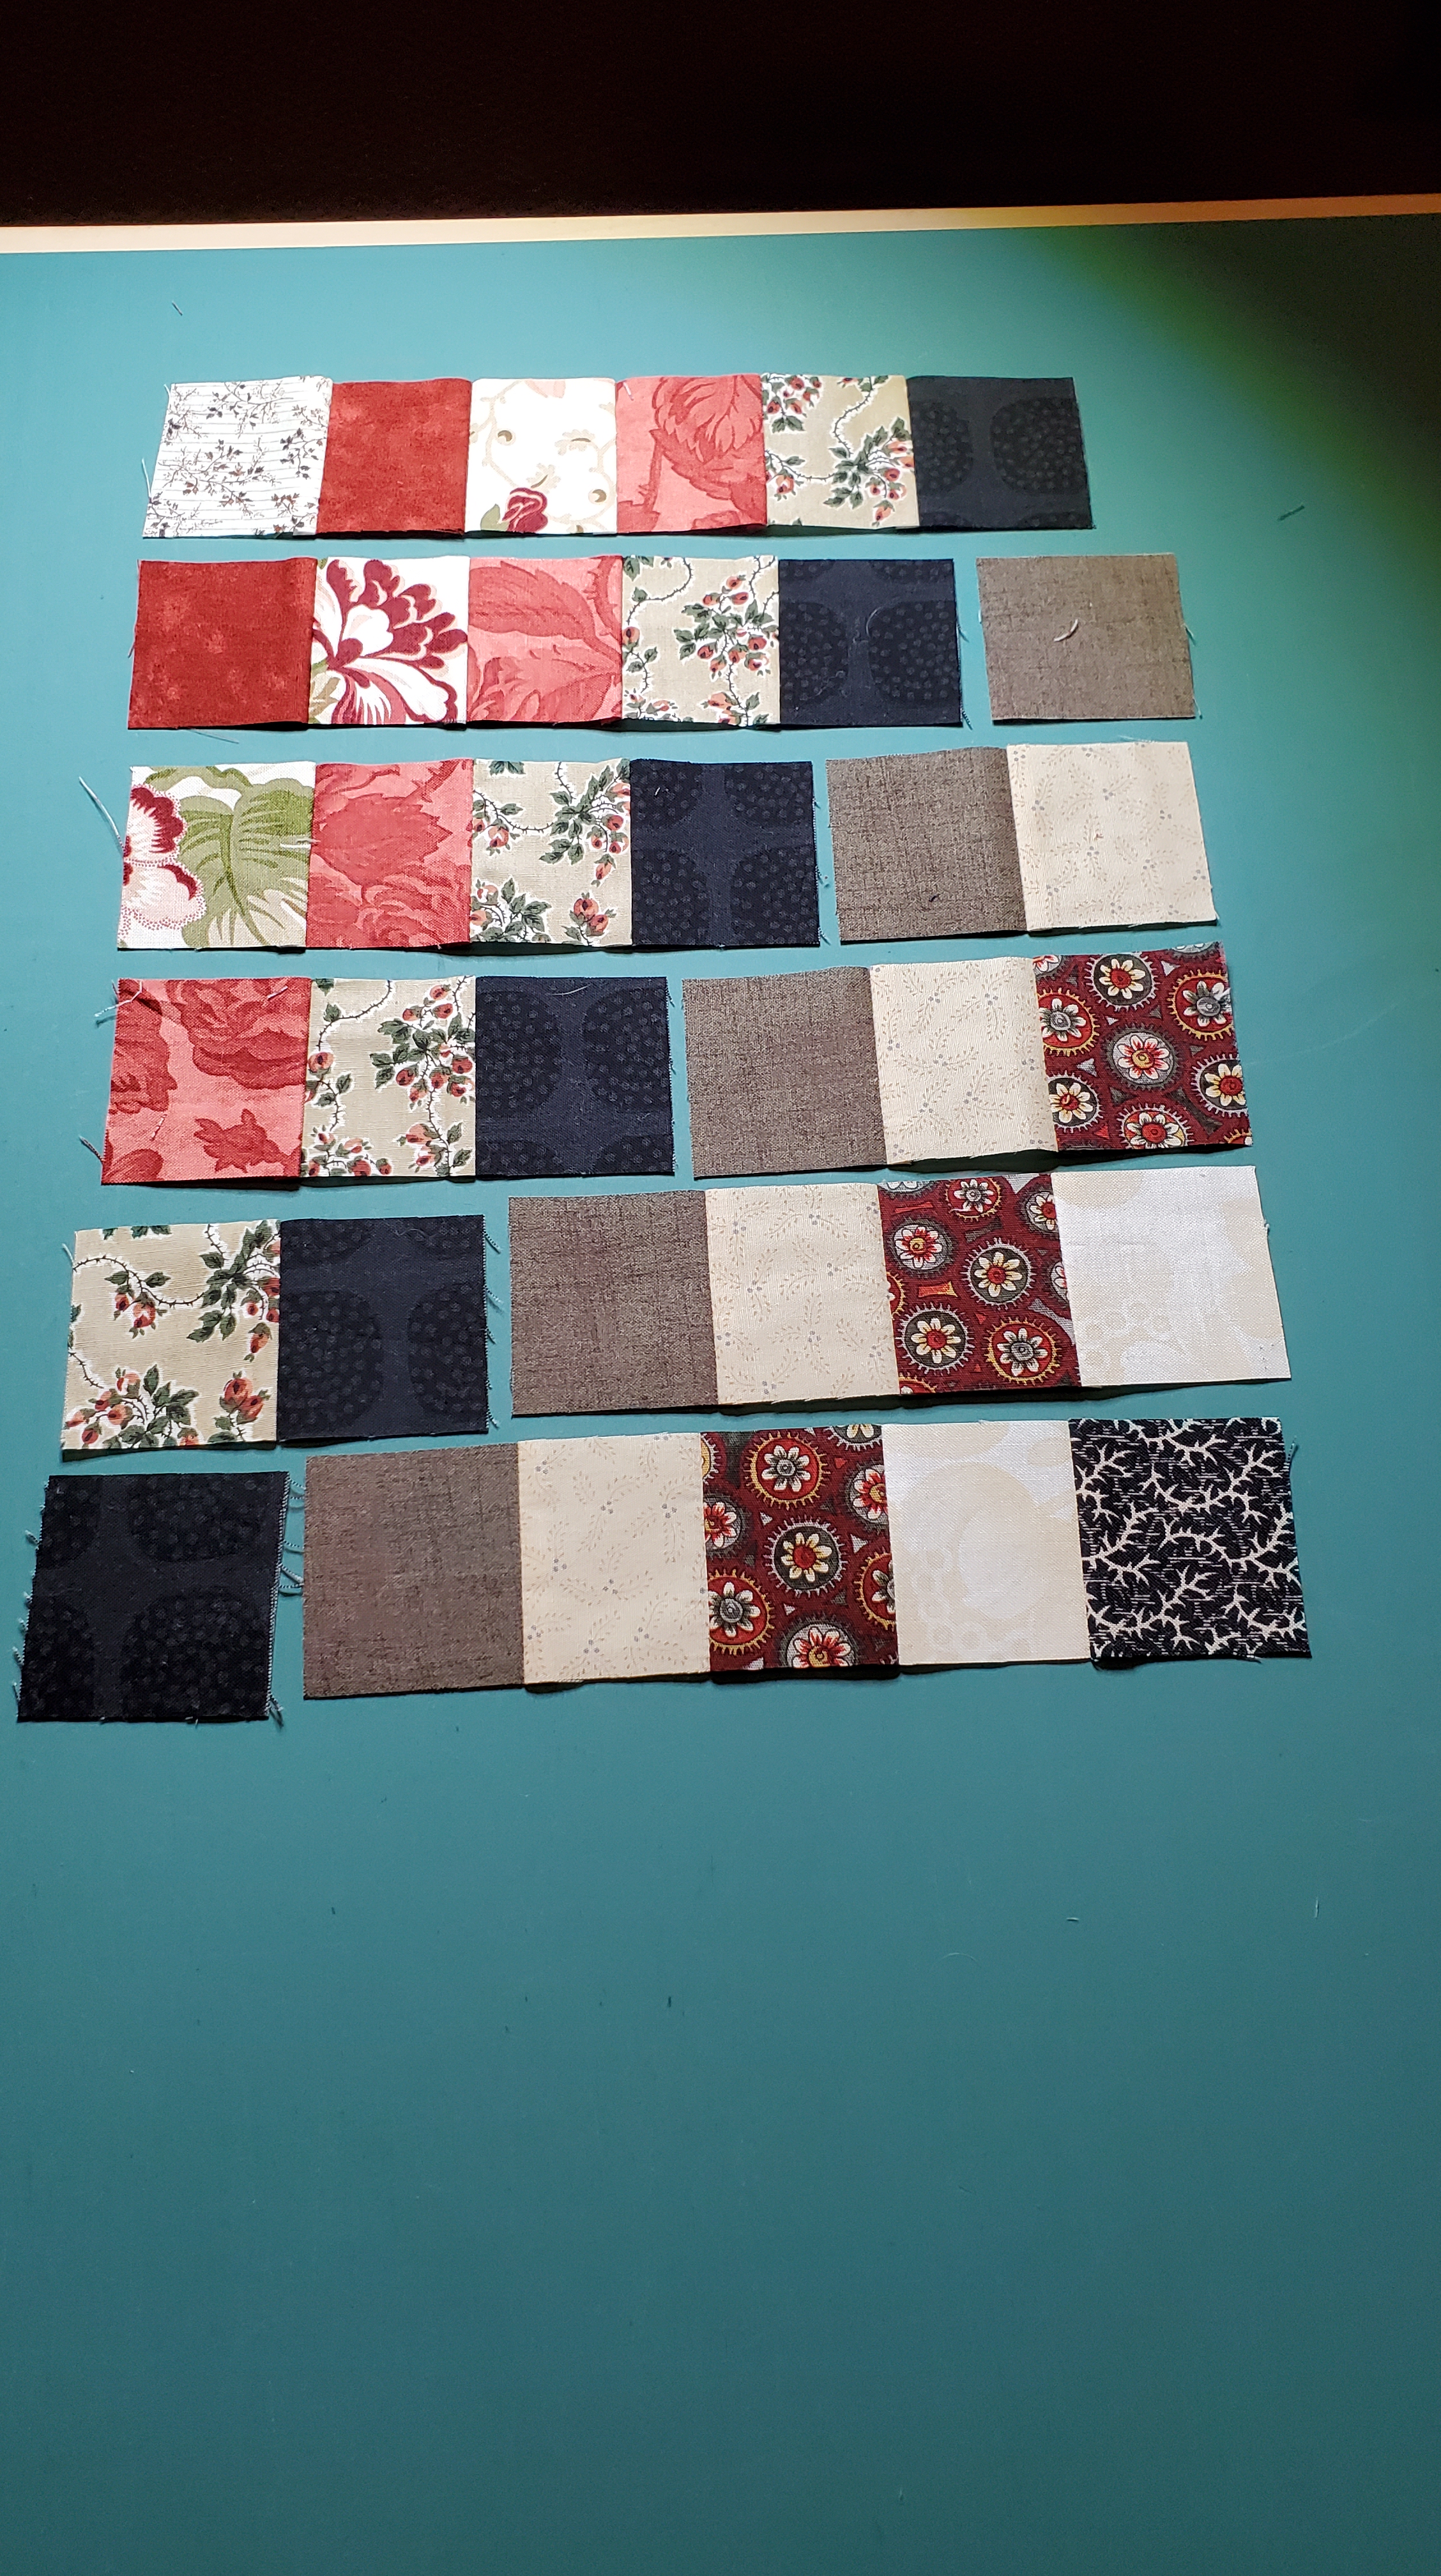
sewing the segments to each other so that each row has 6 squares
and then sewing those rows into a complete block…
…and each quilt has 64 blocks and I committed to 3 quilts, so that’s doing steps 1-5 192 times.
Check out the photos to see a block come together!
So we went from this:
To this:
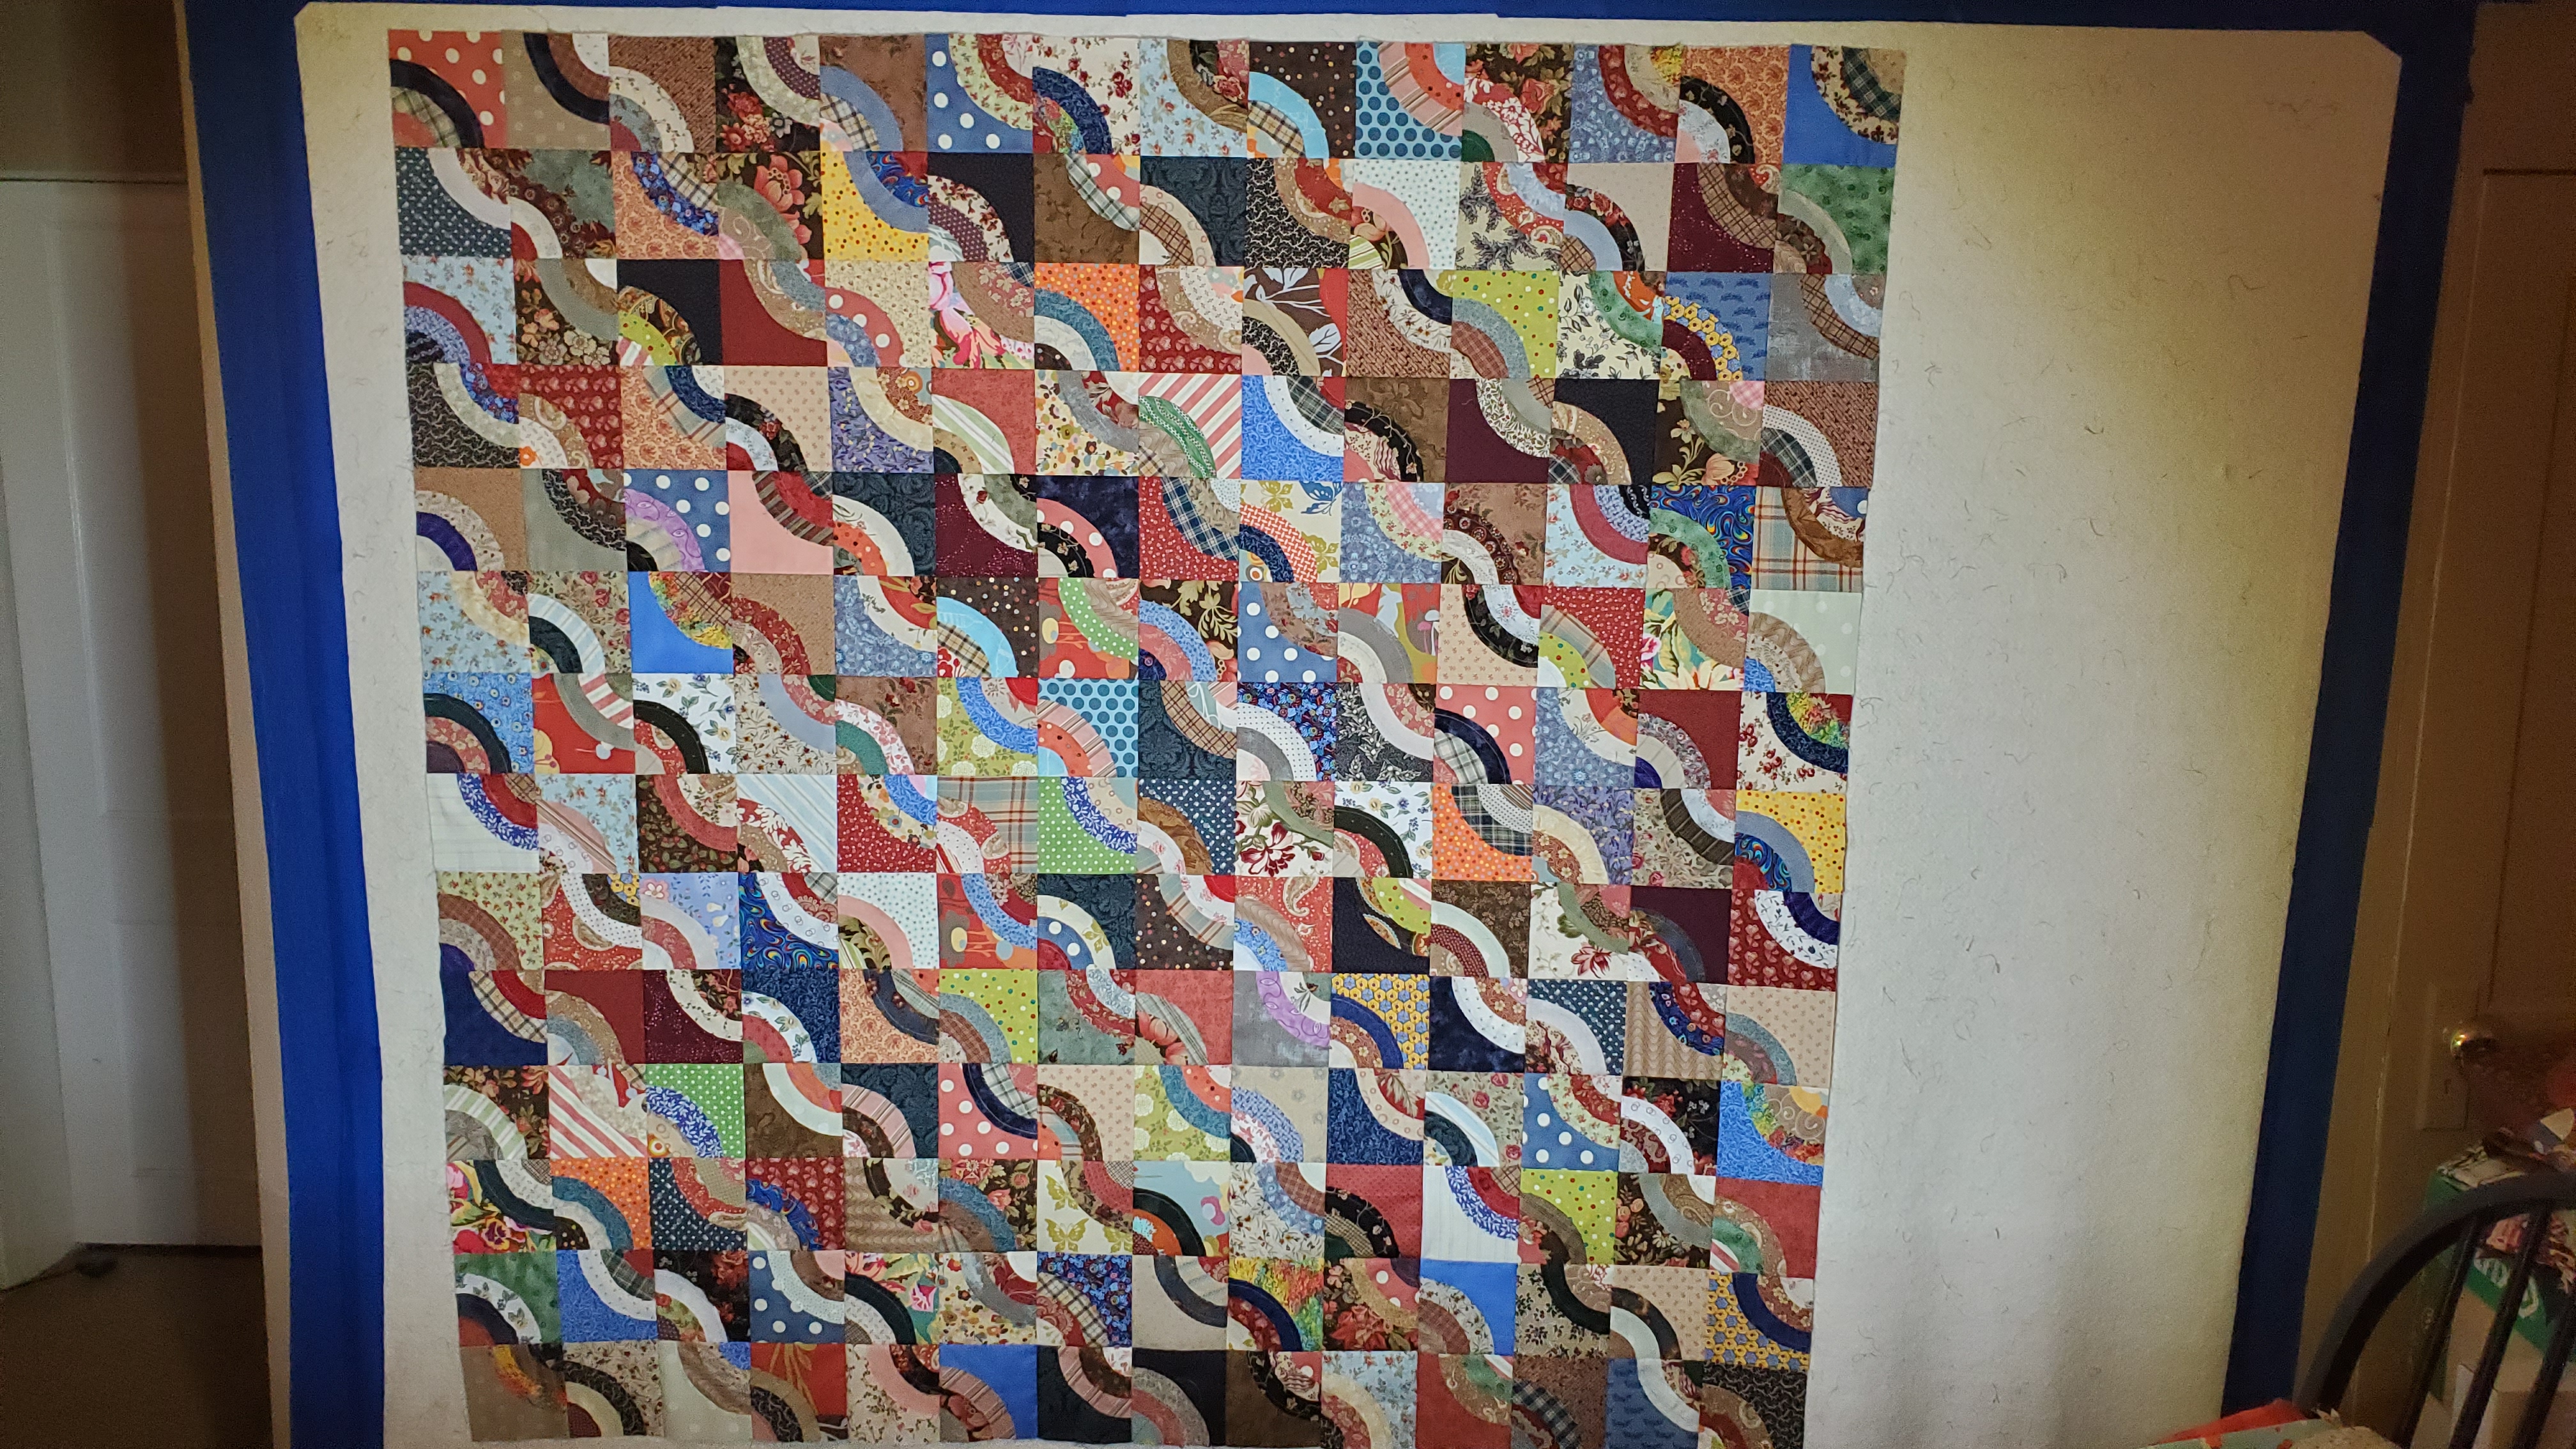
A big mess of scraps and joy…I love it already. I hope you do too!